Making a custom keyboard at home (Part 2)
I continue to work on the custom computer keyboard (part 1). After creating the laser cut parts, I needed to understand the electronic components. Unfortunately I hadn't done anything with an Arduino in a long time, so I was confused about what needed to be done.
To help me learn, I bought an educational Arduino kit and started working on the experiments. That was definitely worth my while. I got comfortable using an Arduino again. I also learned what shift registers are. There will be 10 of them in this keyboard, as they are essential to allow the Arduino to sense the button presses of 71 buttons.
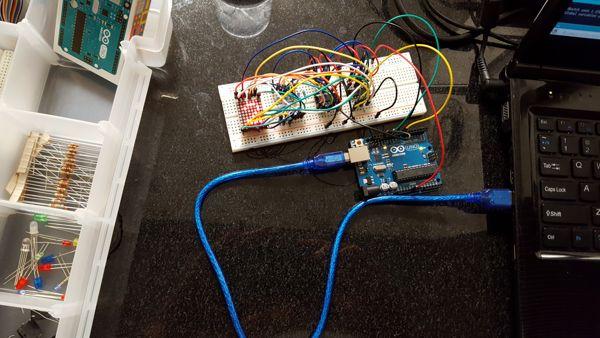
Here's one of the kit's experiments, using two Serial to Parallel shift registers to control a dot matrix LED display.
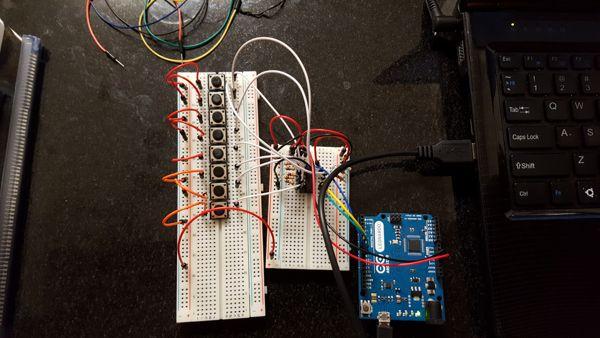
And here's an experiment using one Parallel to Serial shift register to monitor 8 buttons. I was following an Arduino tutorial here:
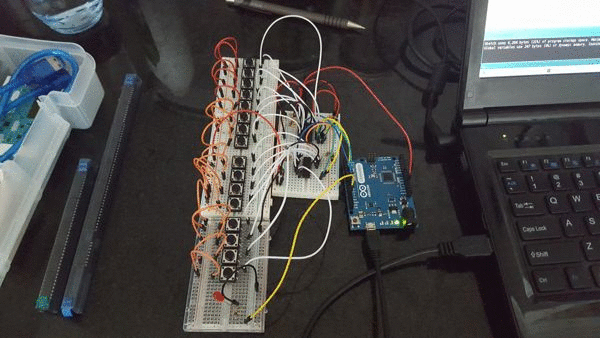
And finally, a prototype 16 button keyboard, mapped to the first 16 letters of the alphabet. I even added an LED that lights up whenever any key is pressed.
Next I need to understand the assembly. I know how to solder, but I don't know how to arrange everything inside the keyboard in a sensible way. I will figure that out before soldering anything together.
Comments