Complete custom keyboard (Part 5)
Behold! The completed custom keyboard:
I am very happy to have finished and delivered the completed keyboard. It took over a year.
Behold! The completed custom keyboard:
I am very happy to have finished and delivered the completed keyboard. It took over a year.
Now the keyboard is pretty much done. For real this time.
Refer to (part 1), (part 2), and (part 3) for the back-story.
I previously wrote that I was "almost done" but in reality I wasn't anywhere near complete. There were many bad solder joints, resulting in shorts and disconnections for many buttons and several shift registers. It was frustrating because I had no idea how to debug it.
Eventually I wrote some Arduino diagnostic code to help me identify the problems. I also read several books on Multimeters. And lots of time studying my soldering joints with a magnifying glass. It was tedious, but now the keyboard works pretty flawlessly. Although it is possible another problem will creep up later, I am confident I will be able to deal with it.
The circuitry is complete. A few minor tweaks to go: some buttons needed to be filed down to fit properly, and perhaps a few more need some work. The keyboard also doesn't have question mark or comma keys. I plan on using a laser cutter to make replacement buttons for the duplicate times and caret characters since they aren't as important. I will take care of it at ITP Camp this summer.
And this is me typing with it! It really works!!
Some photos:

I wrote my own Arduino code to run the Arduino board. My code properly handles multiple key presses and lets the operating system handle key repeats. There is also diagnostic code to blink the Arduino's built-in LED if there is a hardware problem with the shift registers.
I am very happy to have finished the circuitry for this custom keyboard. For a long time this project seemed hopeless. Nevertheless, I stuck with it and now it is clear I will actually finish it properly. The soldering iron that was setup on my kitchen table since August has finally been put away. I'll take it out again later, of course, but for a different project!
Next up, Raspberry Pi experiments.
Almost done with the custom keyboard!
Refer to (part 1) and (part 2) if you have not read them already.
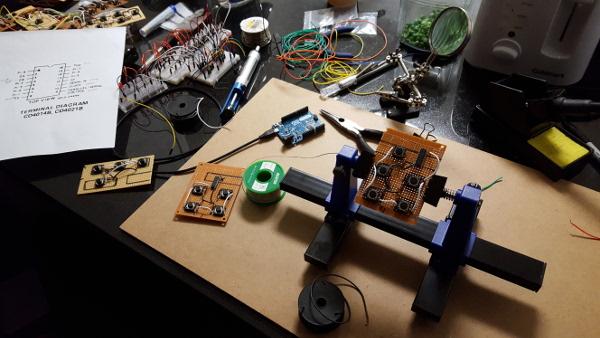
I finally built up the courage to attempt the actual assembly. This part was very difficult and it took me a long time to figure out something that made sense and seemed achievable. There are so many buttons...how am I supposed to organize the buttons, the wires, the shift registers, and the resistors?
I started by soldering the buttons into place in their correct locations on each circuit-board along with resistors and wires for power and ground. Each circuit-board connected the power and ground wires to each other so I only had to add two wires from one board to the next to power the buttons.
I continue to work on the custom computer keyboard (part 1). After creating the laser cut parts, I needed to understand the electronic components. Unfortunately I hadn't done anything with an Arduino in a long time, so I was confused about what needed to be done.
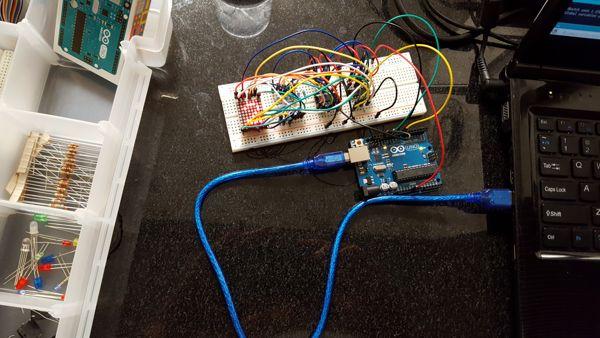
To help me learn, I bought an educational Arduino kit and started working on the experiments. That was definitely worth my while. I got comfortable using an Arduino again. I also learned what shift registers are. There will be 10 of them in this keyboard, as they are essential to allow the Arduino to sense the button presses of 71 buttons.
Here's one of the kit's experiments, using two Serial to Parallel shift registers to control a dot matrix LED display.
I spent the month of June at ITP Camp. It's my third summer in a row there, and as always, I had a blast. This year I attended a session on building a custom computer keyboard. It was taught by Claire Kearney-Volpe and Ben Light.
In the class we met with several members of United Cerebral Palsy and discussed their experiences using computer keyboards. Traditional keyboards often do not meet the needs of disabled people. We talked about ways we could re-design a keyboard to make computers more accessible and meet their usability needs.
I worked with a woman named Shaniqua. She didn't like the traditional key arrangement of a QWERTY keyboard and often found it difficult to find the next key she needed to type. There were some keys she didn't use at all and she thought the keys were too close together.