ITP Classes (old posts, page 14)

User Experience and Interactivity

More reading and Physical Computing experiments!

Sketching the User Experience

Sketching the User Experience, by Saul Greenberg and Bill Buxton, is a book about design techniques that are useful for user experience design. The main idea is that sketching is an effective tool for designers to quickly develop, communicate, and record ideas. The book first explains the importance of design techniques, and then goes through a variety tools a designer can use. Some are obvious, like a simple quick sketch, but others are not approaches I would have thought of on my own.

The book is clear that reading about sketching user experience is not the same actually going through the process sketching user experience. To explore this, I went through the book and thought about how I could incorporate this into my behaviors.

I (almost) always have my phone with me, and I have Evernote on my phone. Evernote has some neat features for storing hand drawings that I don’t use very often. I thought it would be a good idea to explore this and see how easily I can use it to sketch a design.
Read more…

ITP Winter Show 2017

This past week we learned about design composition, and our assignment was to create a poster for ITP's Winter Show. At the end of every semester ITP hosts a show of students' work. The digital and print media advertising the show is designed a student. ITP faculty select one poster design out of many submitted by students. Later this week I am going to submit my design as a potential poster to be used for this winter's show.

Poster Inspiration

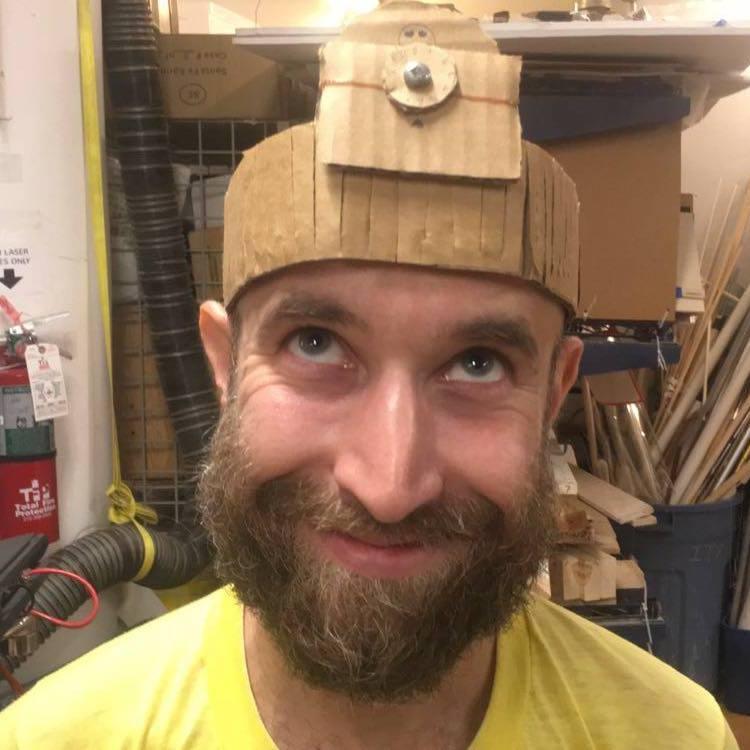
I got the idea for this poster before the assignment was given. My fellow ITP student, Max Horwich, posted this Facebook photo he took of himself after building something in the ITP shop:

Max, smiling and looking up at the odd cardboard hat sitting on his head.

I think this is an amazing photo.

Read more…

Instructable Filming

This week we did the filming for our instructable video on making a laser cut box! Many thanks to my group members Yeonhee and Caleb. Before we started I was pretty apprehensive about filming but we worked thoughtfully and efficiently through each stage of our filming. There are about 9 scenes in our video so we did a lot of lugging camera equipment around. We even took everything to Canal Plastics to film in their store. The store owners were kind enough to let us film there.

In total we have at least 40 to 50 GB of video. We did multiple takes for each section, sometimes using two cameras at the same time. We also created two laser cut boxes, because the assembly step involves using acrylic welding and obviously that can only be done once. Two boxes made the success of each shot less critical.

Read more…

Experiments With Sound

Upcycling a Speaker

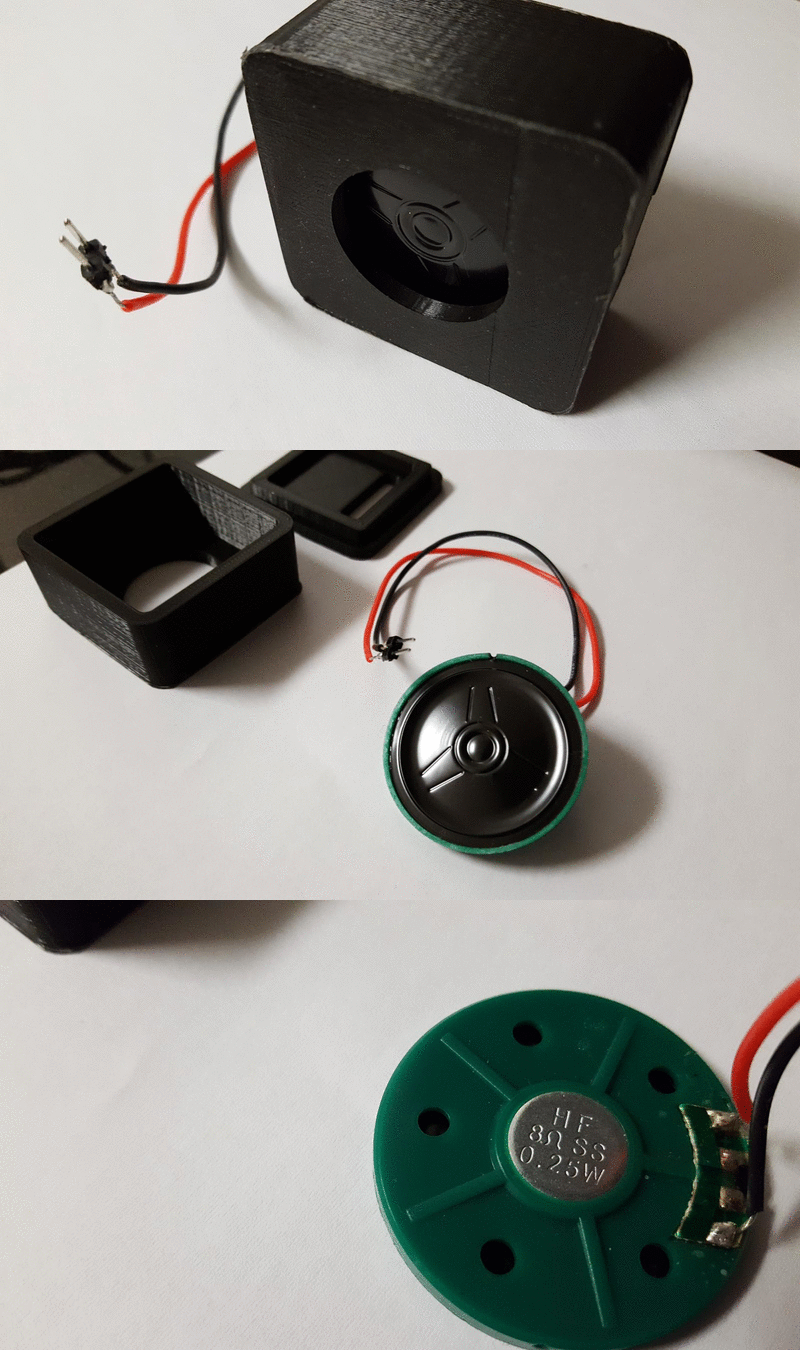
A year ago someone gave me a birthday card that played a song when the card was opened. As I was interested in learning more about circuits, I took apart the card and saved the electrical components for a time when I could dissect them and learn more about how they work. Last week we learned about sound in our physical computing class, so it seemed like a good time to put the inexpensive speaker to good use.

To upcycle the speaker I rewired it to give it red and black wires for the speaker's positive and negative terminals and a header pin to go into a breadboard. I also built a 3D printed case as an assignment for my 3D printing class.

animation showing a few shots of the small 3D printed speaker and the speaker component itself.

Read more…

Color Palette

This week we learned about the use and importance of color in design. Our assignment is to create a color palette that represents us and then use it in several compositions.

This is the color palette I came up with. The primary color is #882222 which is currently the specific shade of red used in my blog's side menu. I happen to like the shade of red a lot. The other colors were selected using Google's Color Selector Tool. I tend to not like the color blue that much but I thought it did compliment the reds quite well so I decided to stick with it.

Eight small circles arranged in a circle, three of which are reddish brown, three are bluish, and the other two are black and white.

Read more…

First 3D Print

My first (mostly) successful 3D print! It is a speaker case for a small speaker I upcycled from a Hallmark greeting card. I intend to use this for my Physical Computing class.

black 3D printed cube-shaped speaker case with small speaker inside

Here's how I made it! First, I measured the speaker dimensions with digital calipers and sketched my idea on paper.

Read more…

Instructable Storyboards and Ira Glass

Laser-cut Box Instructable

For our video project we will make an instructable video on making a laser cut box. The video has a few stages:

  1. Sketch box on paper

  2. Design box using makercase.com and Adobe Illustrator

  3. Purchase materials from Canal Plastics

  4. Laser cut acrylic

  5. Assemble parts with acrylic cement

Note we've already cleared this with ITP Shop Staff. We make sure our video is factually accurate and properly observes shop rules.

We made some storyboards to clarify our thinking.

Read more…

Typography and Expression

This week we learned about typography and how font choices contribute to our design decisions. Fonts and typography contribute much to how well information is communicated to others.

I wanted to learn more about Adobe Illustrator so I went through some tutorials to get a basic understanding of the application, then dove into these assignments.

Expressive Words

Our first assignment is to create expressive words. Expressive words are representations of words that convey the meaning of the word through the fonts used to display the word.

Using a thesaurus for ideas, I picked the word opaque. The word is displayed in a bold black font with its antonyms layered behind it in semi-transparent colors.

The word "opaque" in the center with words related to transparency like glassy and diaphanous randomly placed behind it.

Read more…

Input and Output Experiments and Weekly Readings

Electronics Lab

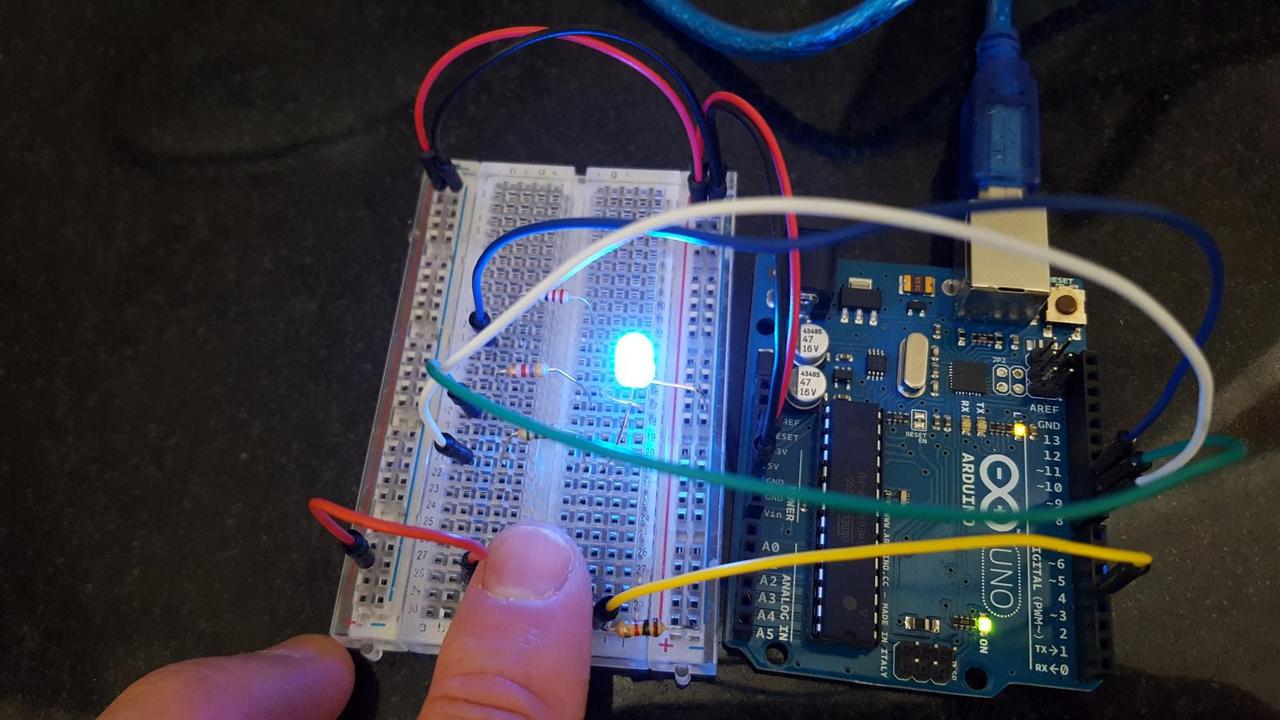
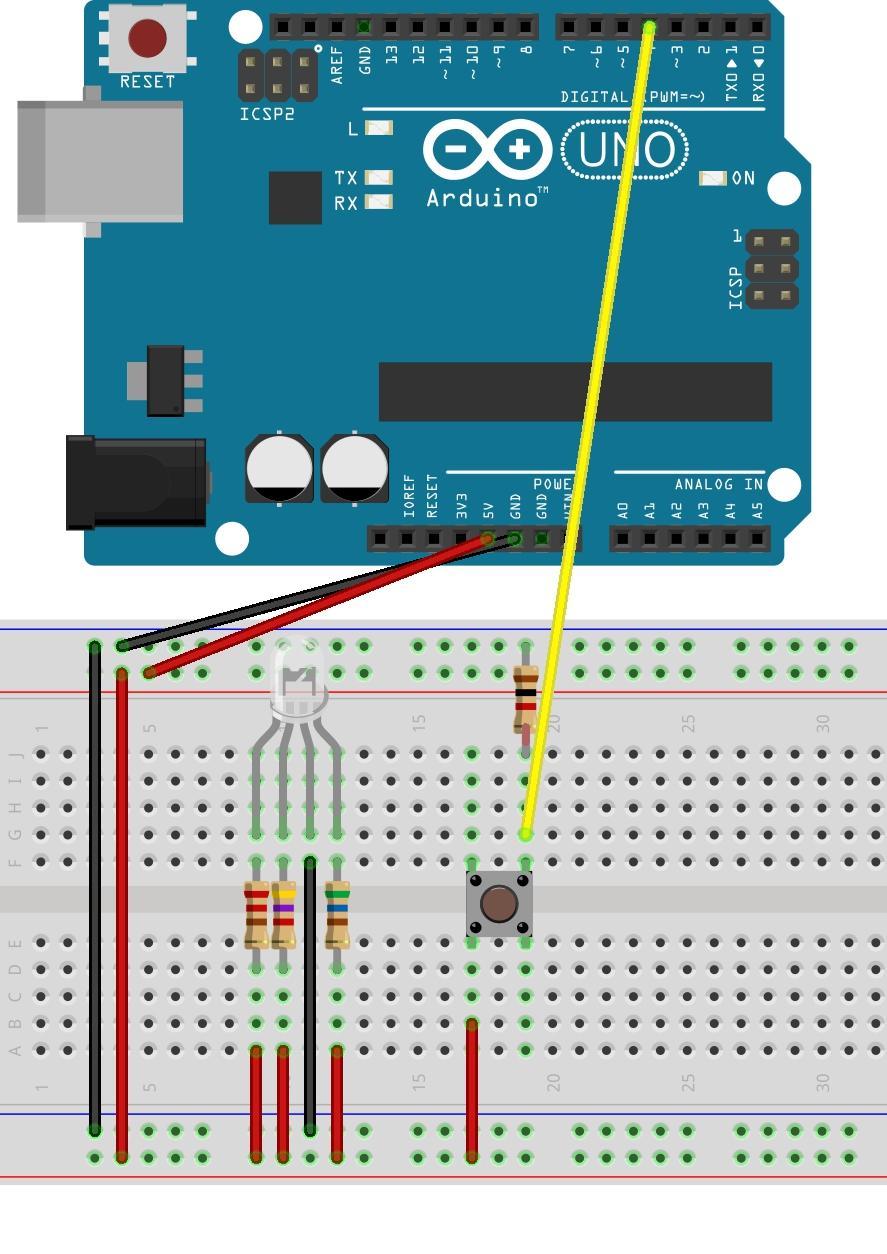
Our assignment for this week was to create something using digital or analog inputs and outputs. The circuit I created will light up a 3-color LED with a new randomly selected color when a button is pressed.

Here is a photo of the completed device:

arduino connected to breadboard with single 3 color LED lit up, and three resistors connected to the LED leads, and resistors connected to pins 8, 9, and 10.

And a schematic of the circuit:

incorrect circuit diagram! arduino connected to breadboard with single 3 color LED, and three resistors connected to the LED leads, but the resistors are incorrectly connected to power and not pins 8, 9, and 10.

The Arduino uses digital input to detect when the button is pressed and released. It picks random RGB values and outputs analog values to light up the 3 color LED in that color. Observe I am using the 3 resistor values I calibrated for last week's assignment to make the LED's 3 colors balance out.

Read more…

Things That Fit Together

This week we learned new tools for constructing 3D objects. Our assignment is to use what we learned to build something with two parts that fit together.

My idea for this assignment was to build a phillips-head screw. I had a real screw that I used to model my Rhino screw. I began by making careful observations of the screw with a magnifying glass because I wanted the threads, curvature, and proportions to be as realistic as possible. I used digital calipers to take measurements that I incorporated into my design sketch.

Crude drawing of a screw with measurements for width, length, and distance between threads. Also, real screw in the upper right corner.

It took a lot of experimentation to figure out how to do this. I settled on an approach using Rhino's Taper and Helix commands. After tapering a helix shaped line, I can then use that line with the Sweep1 command to make the threads. It is important to taper before adding the threads because the Taper command distorts the threads in an unrealistic way.

Read more…