My Blog (old posts, page 5)

First Jupyter Notebook Post

This is a blog post created in Jupyter notebook.

The goal is to see how well this feature works. I'd like to be able to post Python code to my blog. Happily, Nikola supports that seamlessly.

Normally Nikola preserves the width of each notebook cell. It makes sense that it does this but that doesn't work so well with this template because of the navigation bar on the left side of the screen. That's OK, I can override it by changing the notebook styling with this if I need to:

#notebook-container {
  width: 800px;
}

And here is some Python code:

In [1]:
def square(x):
    return x**2

for i in range(10):
    print(square(i))
0
1
4
9
16
25
36
49
64
81

And a plot:

In [2]:
%matplotlib inline
import matplotlib

import pandas as pd
import pandas.util.testing as pd_testing
In [3]:
df = pd_testing.makeTimeDataFrame(20)
df.index = pd.date_range(start=pd.Timestamp.now().floor('D'), periods=df.shape[0])

df.plot(figsize=(10, 5))
Out[3]:
<matplotlib.axes._subplots.AxesSubplot at 0x7f57609a2fd0>
four random colored lines ranging from -2 to 2 on the y axis and 20 days on the x axis

Magnificent!

Camera3D and 360 Video

A new version of Camera3D has been released!

Version 1.2 supports 360 videos. Here is an example:

In addition, I made some performance improvements using new tools found in Java 1.8. Processing 2.x is no longer supported.

More information available on the Camera-3D Camera-3D project page.

Lux Aeterna

I've spent the past few months learning Clint Mansell's Lux Aeterna, otherwise known as Requiem for a Dream. It's a piece I enjoy very much and have wanted to play since I found some videos of other people playing it on youtube.

I made a few small mistakes but they are hardly noticeable. It wasn't my best day for recording myself playing.

Read more…

Mostly complete keyboard (Part 4)

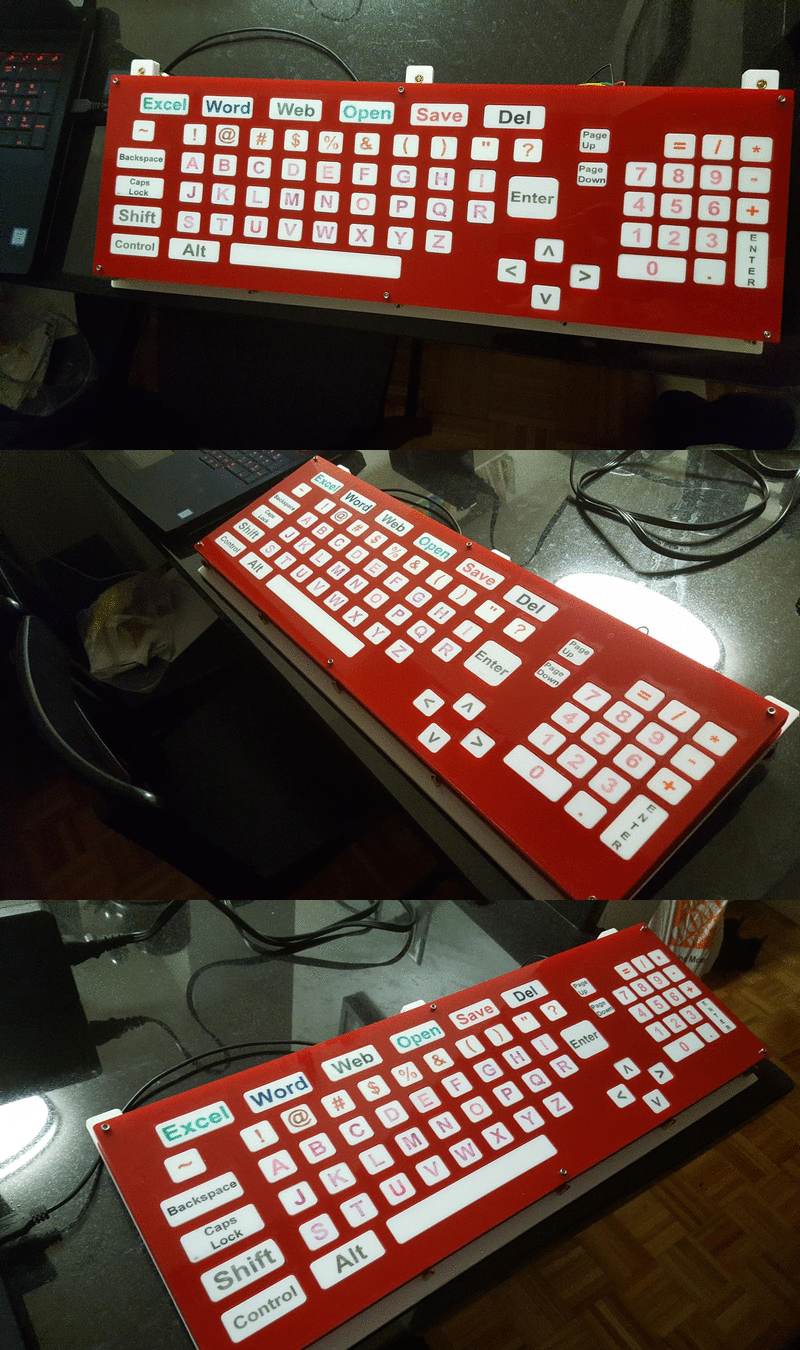
Now the keyboard is pretty much done. For real this time.

Refer to (part 1), (part 2), and (part 3) for the back-story.

I previously wrote that I was "almost done" but in reality I wasn't anywhere near complete. There were many bad solder joints, resulting in shorts and disconnections for many buttons and several shift registers. It was frustrating because I had no idea how to debug it.

Eventually I wrote some Arduino diagnostic code to help me identify the problems. I also read several books on Multimeters. And lots of time studying my soldering joints with a magnifying glass. It was tedious, but now the keyboard works pretty flawlessly. Although it is possible another problem will creep up later, I am confident I will be able to deal with it.

The circuitry is complete. A few minor tweaks to go: some buttons needed to be filed down to fit properly, and perhaps a few more need some work. The keyboard also doesn't have question mark or comma keys. I plan on using a laser cutter to make replacement buttons for the duplicate times and caret characters since they aren't as important. I will take care of it at ITP Camp this summer.

And this is me typing with it! It really works!!

Some photos:
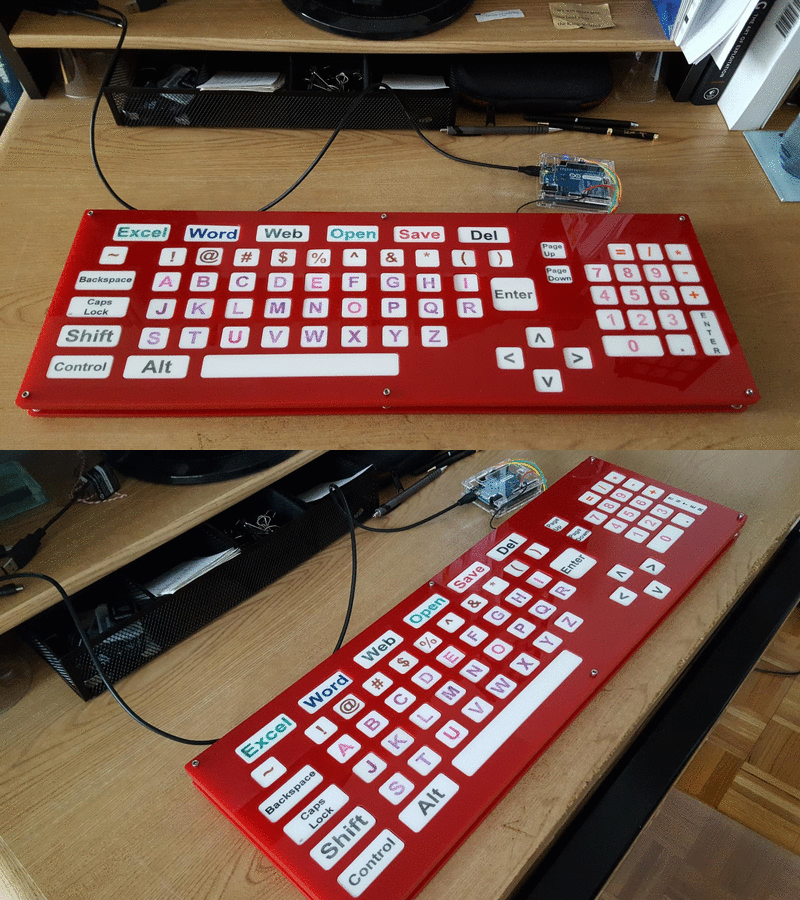
acrylic keyboard sitting on a wooden desk connected to a computer with a USB cable.

I wrote my own Arduino code to run the Arduino board. My code properly handles multiple key presses and lets the operating system handle key repeats. There is also diagnostic code to blink the Arduino's built-in LED if there is a hardware problem with the shift registers.

I am very happy to have finished the circuitry for this custom keyboard. For a long time this project seemed hopeless. Nevertheless, I stuck with it and now it is clear I will actually finish it properly. The soldering iron that was setup on my kitchen table since August has finally been put away. I'll take it out again later, of course, but for a different project!

Next up, Raspberry Pi experiments.
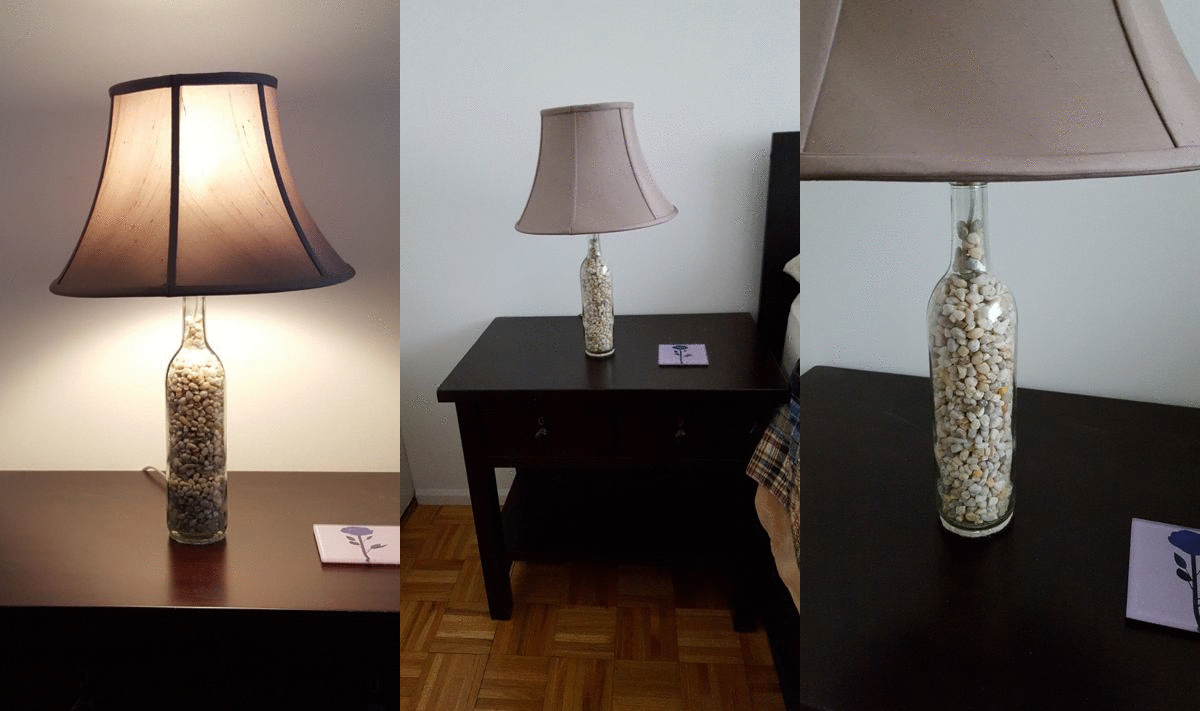
In memory of my lamp

Tragically, the second lamp I made at ITP camp is gone.

animation showing the lamp sitting on a nightstand. It is on in the first frame, off in the second, and the third shows a closeup of the lamp base, showing the gravel inside the wine bottle base.

I accidentally toppled it today. It fell, shattering into pieces.

I am not upset though. Most of the parts were salvageable and will be re-used in a future lamp. I have three wine bottles with holes already drilled in them, so I can make an identical lamp if I want to. I won't though. I realize now that filling the bottle to the top with gravel raised the center of gravity higher than where it should be. The next one will will be half filled with gravel. How about plastic or glass beads for the top half? I could make something that looks fishtank-like. I am sad that lamp is gone, but know that the next lamp will be better.

And now is a good time for a public service announcement on the proper way to clean up glass:

Very effective. I had bread-crumbs everywhere but that is much easier to deal with than the broken glass.

Finishing a custom keyboard at home (Part 3)

Almost done with the custom keyboard!

Refer to (part 1) and (part 2) if you have not read them already.

I finally built up the courage to attempt the actual assembly. This part was very difficult and it took me a long time to figure out something that made sense and seemed achievable. There are so many buttons...how am I supposed to organize the buttons, the wires, the shift registers, and the resistors?

I started by soldering the buttons into place in their correct locations on each circuit-board along with resistors and wires for power and ground. Each circuit-board connected the power and ground wires to each other so I only had to add two wires from one board to the next to power the buttons.

circuit board with five buttons on it in a vice. wires connecting the buttons are being soldered together.

Read more…

Recently tuned piano

Recently I got my piano tuned and I re-recorded myself playing a few songs.

Here is Pachelbel's Canon in D. I played this at my brother's wedding in a few weeks ago. I didn't play it as well as I do here but I did my best. It's hard playing for an audience!

Read more…

Making a custom keyboard at home (Part 2)

I continue to work on the custom computer keyboard (part 1). After creating the laser cut parts, I needed to understand the electronic components. Unfortunately I hadn't done anything with an Arduino in a long time, so I was confused about what needed to be done.

To help me learn, I bought an educational Arduino kit and started working on the experiments. That was definitely worth my while. I got comfortable using an Arduino again. I also learned what shift registers are. There will be 10 of them in this keyboard, as they are essential to allow the Arduino to sense the button presses of 71 buttons.

Here's one of the kit's experiments, using two Serial to Parallel shift registers to control a dot matrix LED display.

Arduino connected to a breadboard with lots of wires controlling two shift registers. The shift registers are connected to a dot matrix display, currently displaying the number 2.

Read more…

Improved Pachelbel's Canon in D

Here's an improved rendition of Pachelbel's Canon in D. This time I used the pedal and didn't speed up as I approached the crescendo. I made one or two mistakes but they are relatively minor.

And I also recorded this on the first try, without sheet music! The previous recording took 20 attempts.

There's also a new connect the dots puzzle available, depicting a Pterodactyl.