MIDI Meditation
Camilla and I built a MIDI Meditation machine for our midterm project. The device is equipped with a heartbeat sensor to detect when the user's heart beats. It plays a single MIDI note in sync with the heartbeat. The main idea is to help the user become more aware of their heartbeat while meditating and possibly get needed feedback for lowering their heart-rate through meditation.
The interaction is intriguing and stimulated the curiosity of our classmates. Several people gave it a try and enjoyed the experience. I'm not a meditation practitioner but I did give it a try. My heart-rate stayed constant throughout while I became more aware of my heart beating. Hearing the same note play in sync with my heart was surreal.
A photo of the device, taken by Camilla, is below:
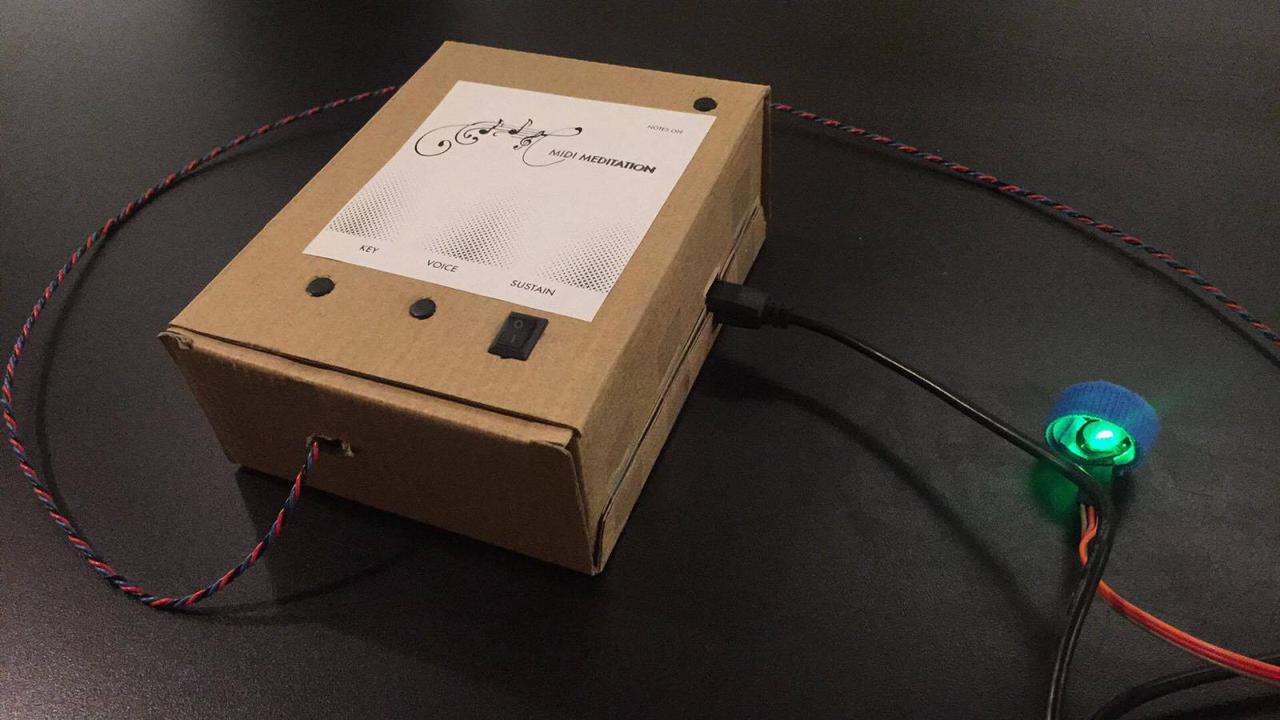
The three buttons along the bottom allow the user to change the note's pitch, the note's voice or instrument type, and a sustain switch. The button on the top is a special button to send a MIDI message to terminate all notes. This is useful to quiet the machine before disconnecting it. The heartbeat sensor is at the end of the braided wire. The user will put this on their finger and configure the device to play a note in their favorite instrument.
I had a lot of fun building this with Camilla. Both of us learned much from the project. In particular, I learned more about Serial communication and MIDI instruments. Also had some fun using Python and PySerial to communicate with an Arduino. The ability to communicate with a microcontroller like that opens up a lot of project ideas for me.
I also enjoyed helping Camilla learn more about coding and electronics. I am by no means an expert in electronics but I was able to teach her how to do the soldering for our components. Figuring out how to build the enclosure and assemble everything is something we figured out together. She's a good teammate and I'm happy to have gotten to know her better through this project.
Assembly
Our device is housed in a simple cardboard box that was opened up and turned inside out. We cut holes in the top surface with a hole puncher or box cutter to make room for the buttons and switch. We also cut holes in the sides for the various wires to come out.
I'm quite happy with our cardboard box enclosure. It's ecologically sensible and easy to work with. I will definitely use this prototyping choice again in the future.
Our buttons are super glued and hot glued to the surface of the cardboard. The buttons are stable and don't fall into the box when pushed. An Arduino and breadboard are inside with header pins and wires connecting the buttons to the other components. The buttons use pulldown resistors in their wiring.
Arduino Code
There are two important aspects of the code that I will highlight. The first is the algorithm for detecting a user's heartbeat. This is discussed at length in a previous post and will not be repeated here. The other has to do with the MIDI communication protocol. I knew very little about MIDI beyond MIDI music files that sound much worse than other audio formats. It turns out that MIDI involves a rich language of binary communication that hardware and software MIDI applications all implement, allowing devices to communicate with each other. Since our device outputs proper MIDI commands, it should be able to work seamlessly with other MIDI tools.
The MIDI protocol is composed of command messages and value messages. The command messages, sent with a single byte, can instruct a synthesizer to start or stop playing a particular note on a specific MIDI channel. That particular command message must be followed by two value bytes to communicate the note to be played and the volume of that note.
Any command message byte will always have the first bit set to 1. The next three bits are to identify the command and the final four bits are for the channel number.
Any value byte must have the first bit set to 0, lest it be confused with a command byte. This limits the range of the possible values to 0 to 127. It seems a bit limiting at first but the MIDI language specification is flexible enough to allow a wide range of commands and customizations to support complex audio applications.
Comments