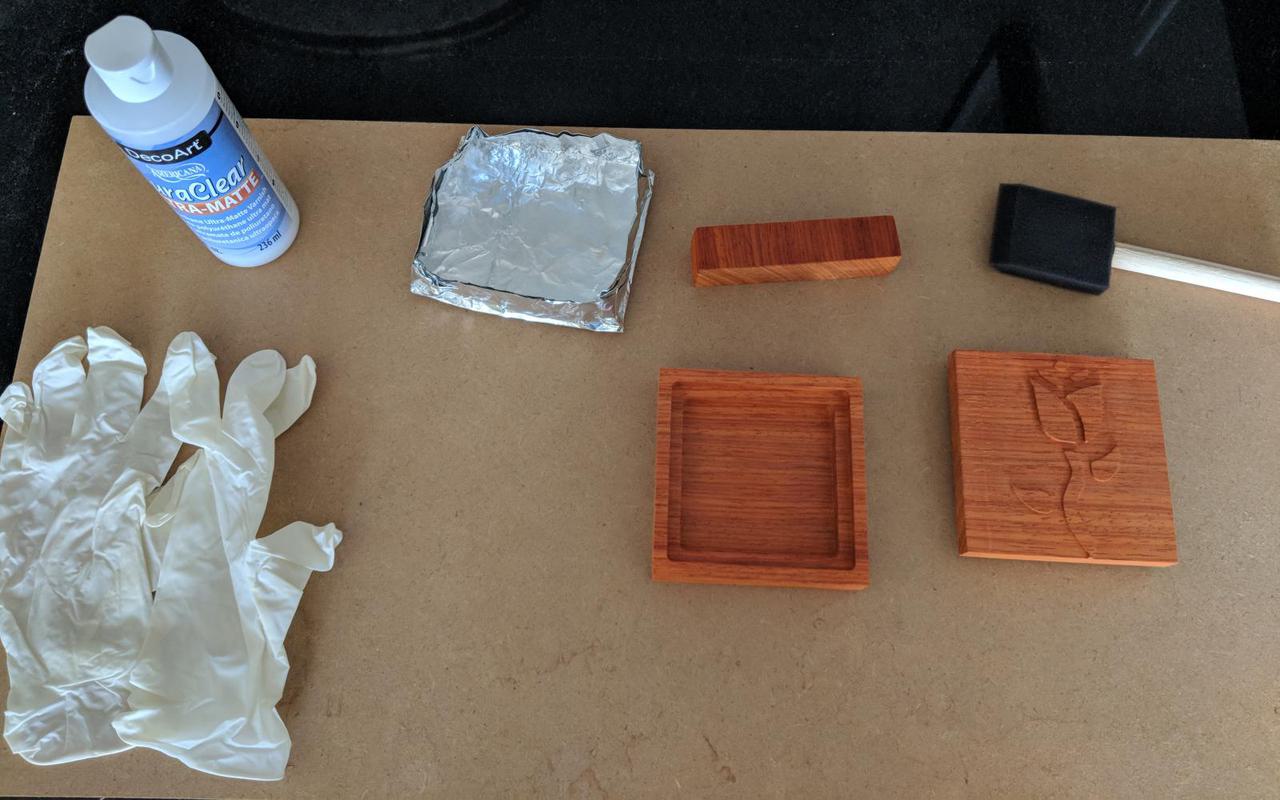
Wooden Box
For my Subtraction final I made this decorative box:
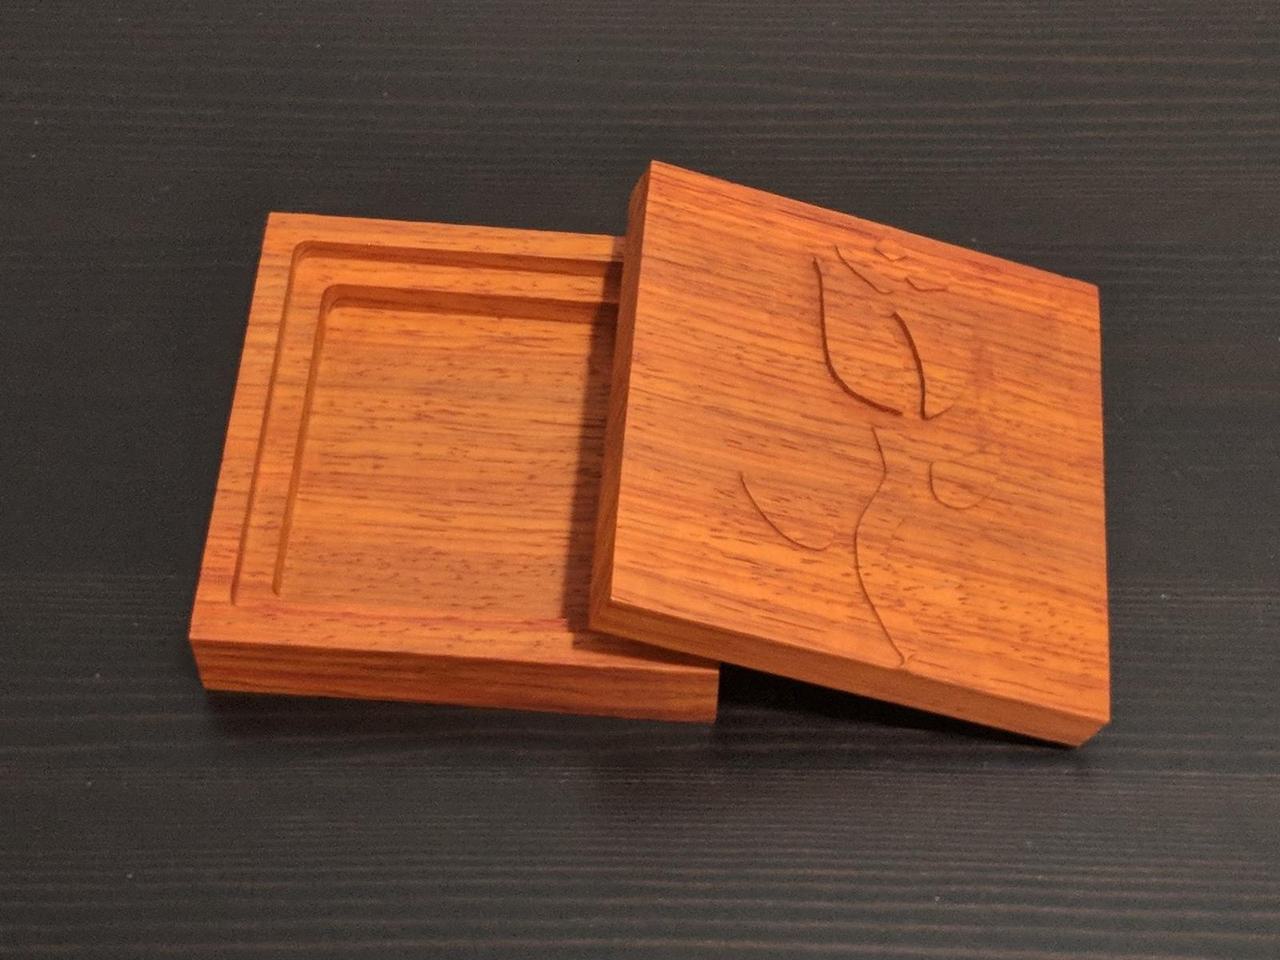
Every time I look at it I'm amazed I made it.
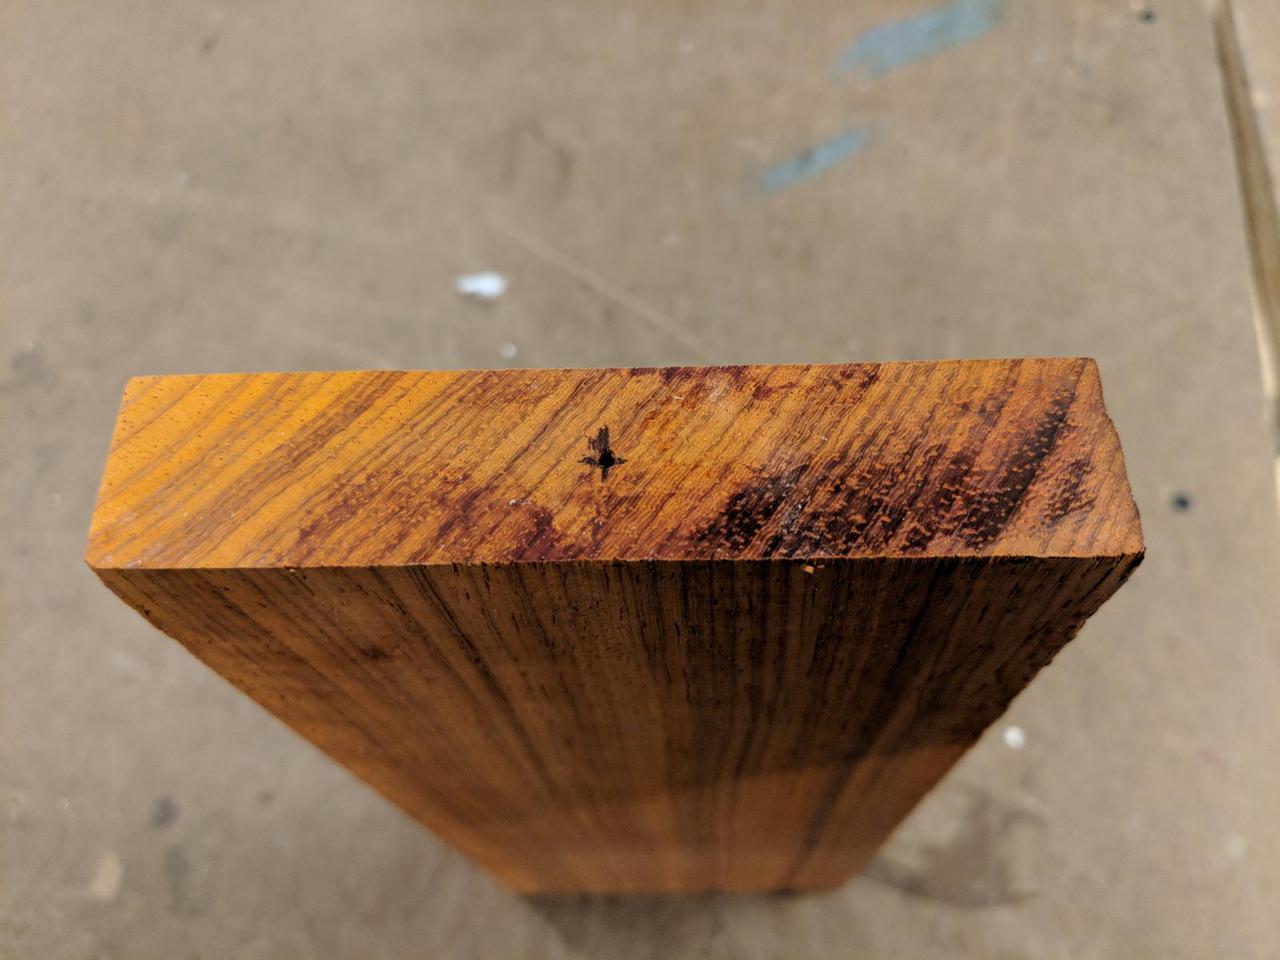
The reddish-orange wood comes from a Padauk (pah-DUKE) tree commonly found in Africa. It also goes by the name Vermillion.
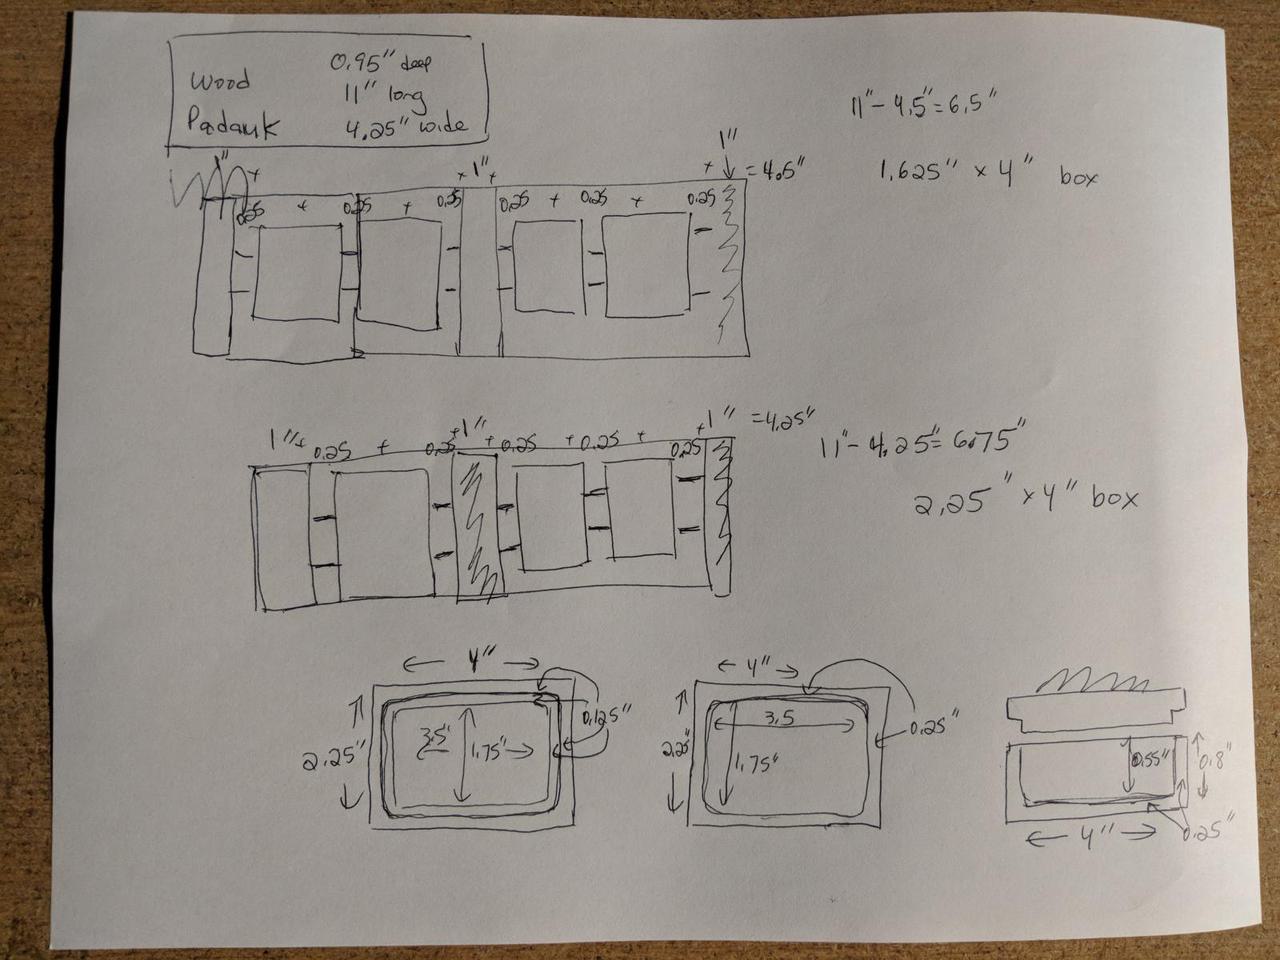
To make this I started with a plan. The wood came from the box of exotic wood end-cuts I bought through Amazon a few weeks ago. I also used that wood for the Wooden Mallet project. The original piece of Padauk wood was 11" long by 4.25" wide and 0.95" deep. My box had to be cut from a piece of wood that size. Since the wood wasn't very thick the box couldn't be tall.
I wanted the top and bottom to fit together properly without any wiggling. I was concerned about tolerances and didn't know what tolerance to allow for in the design. With a new kind of wood it is a bit of a guess. What if I guess incorrectly? I didn't have a second piece of Padauk wood to use if something went wrong. My original plan for coping was to design the box to not use the entire piece of wood. If the tolerances were wrong I could measure the error and mill a properly fitting piece.
I sketched this on a piece of paper to see what the resulting box size would be with this approach. Notice in the below diagram I am also incorporating my own supports into the design.
Unfortunately the math didn't work out. The box would be unacceptably small.
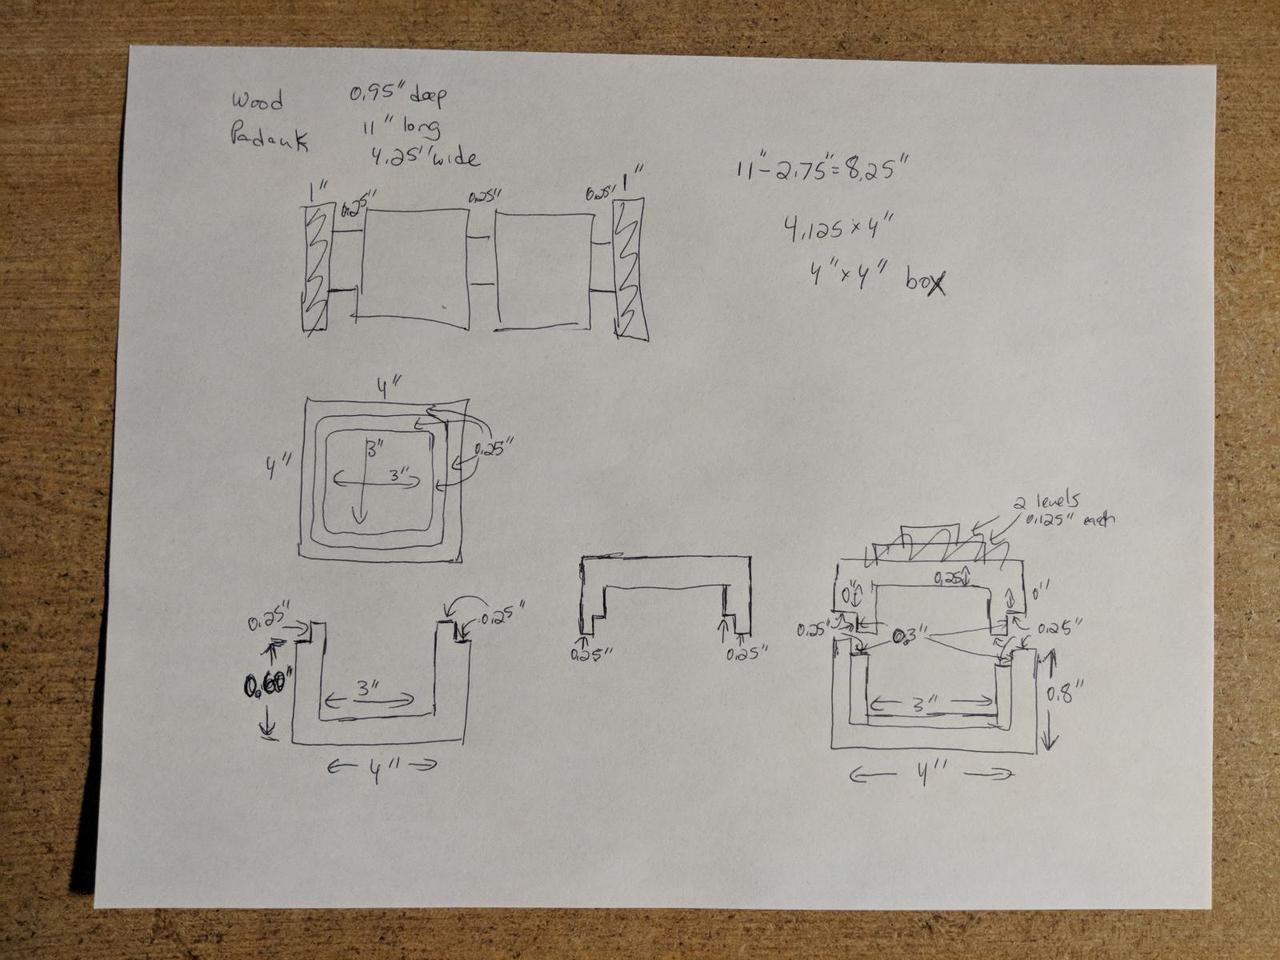
I had to use the entire piece of wood for the top and bottom. That means I had only one shot at getting this right. I used a tolerance of 0.01" because that's what I used in the Joint Experiment skill builder and my Towel Rack midterm project. I knew that if it was too tight I could use metal files to carefully sand it down and make it fit. If it was too loose I might be able to add an extra layer of varnish finish to thicken it.
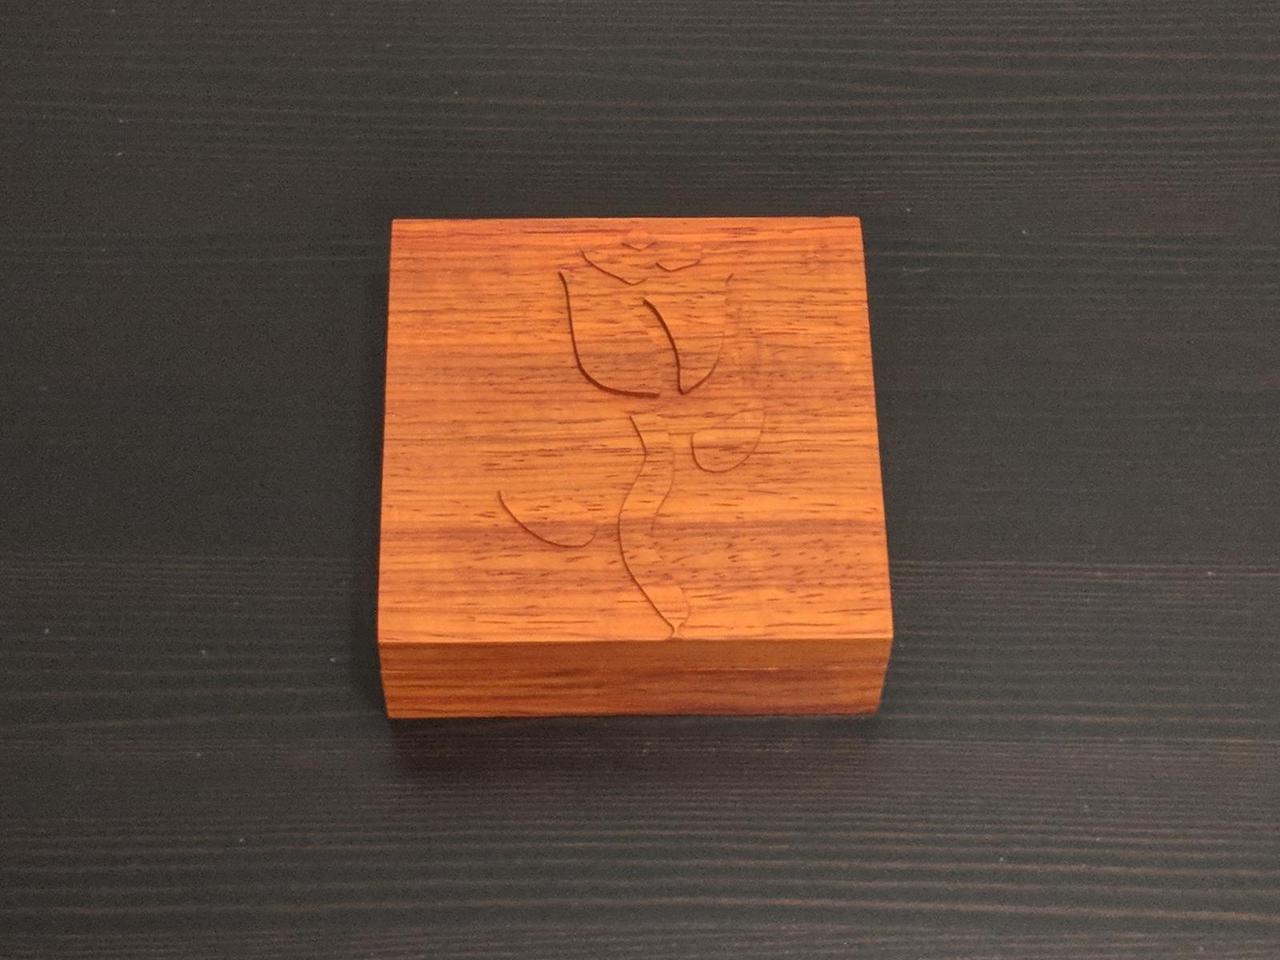
I wanted to have a milled picture on top of the box. I like flowers and hand-drew a rose illustration.

My intention was for the black area to be a relief carving, not an engraving into the wood. That drawing isn't necessarily mill-able though. The bit would need to be able to pass between the black areas. I had to clean it up in Photoshop a bit to make this final version:

Going from a hand-drawn picture to a 3D Vectorworks object took about 3 hours. It took me a while to figure out how to do that. One of the key insights I had is to ensure that a circular paint brush sized properly can pass between the black areas. If the image size is 4" by 4" at 72 dpi, that means a 1/8" mill bit is equivalent to a 9 dpi brush. To be safe I used a 15 dpi brush. I didn't want to get to the 4-axis machine and find out the software doesn't think there is enough room for the bit to mill part of my design.
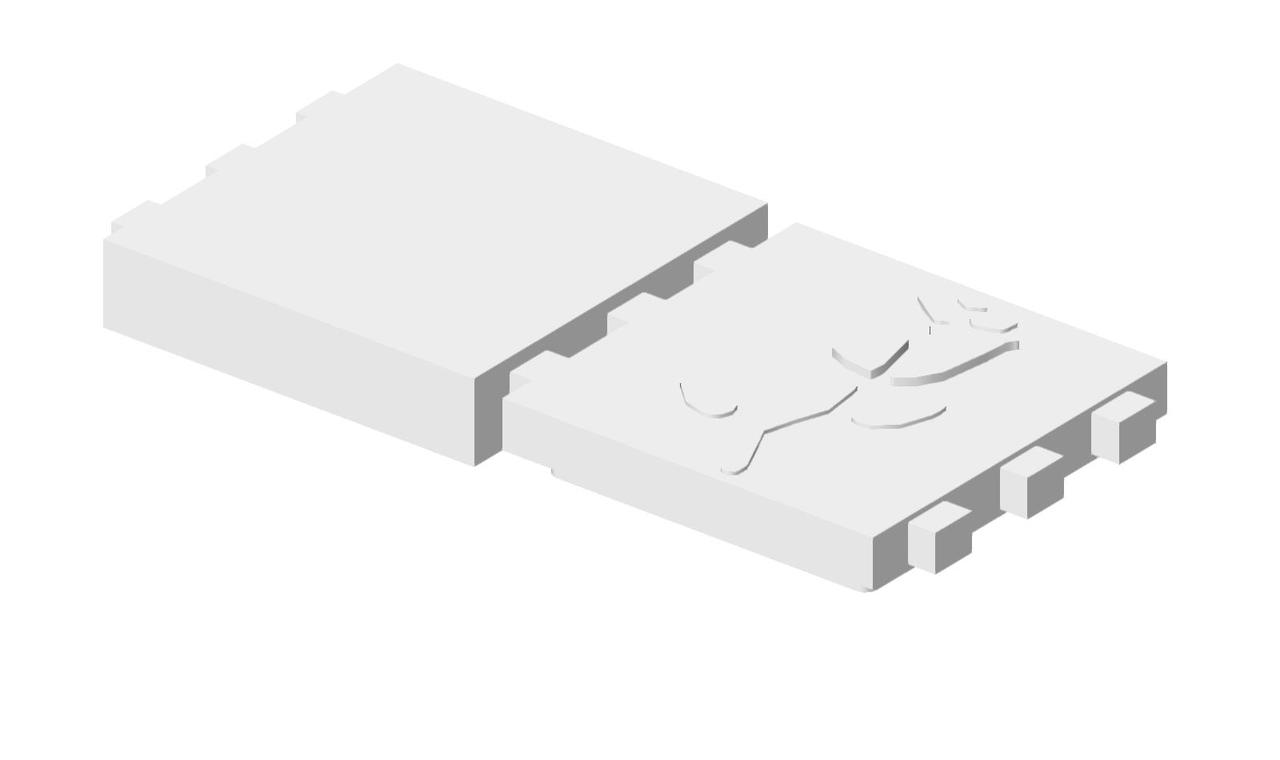
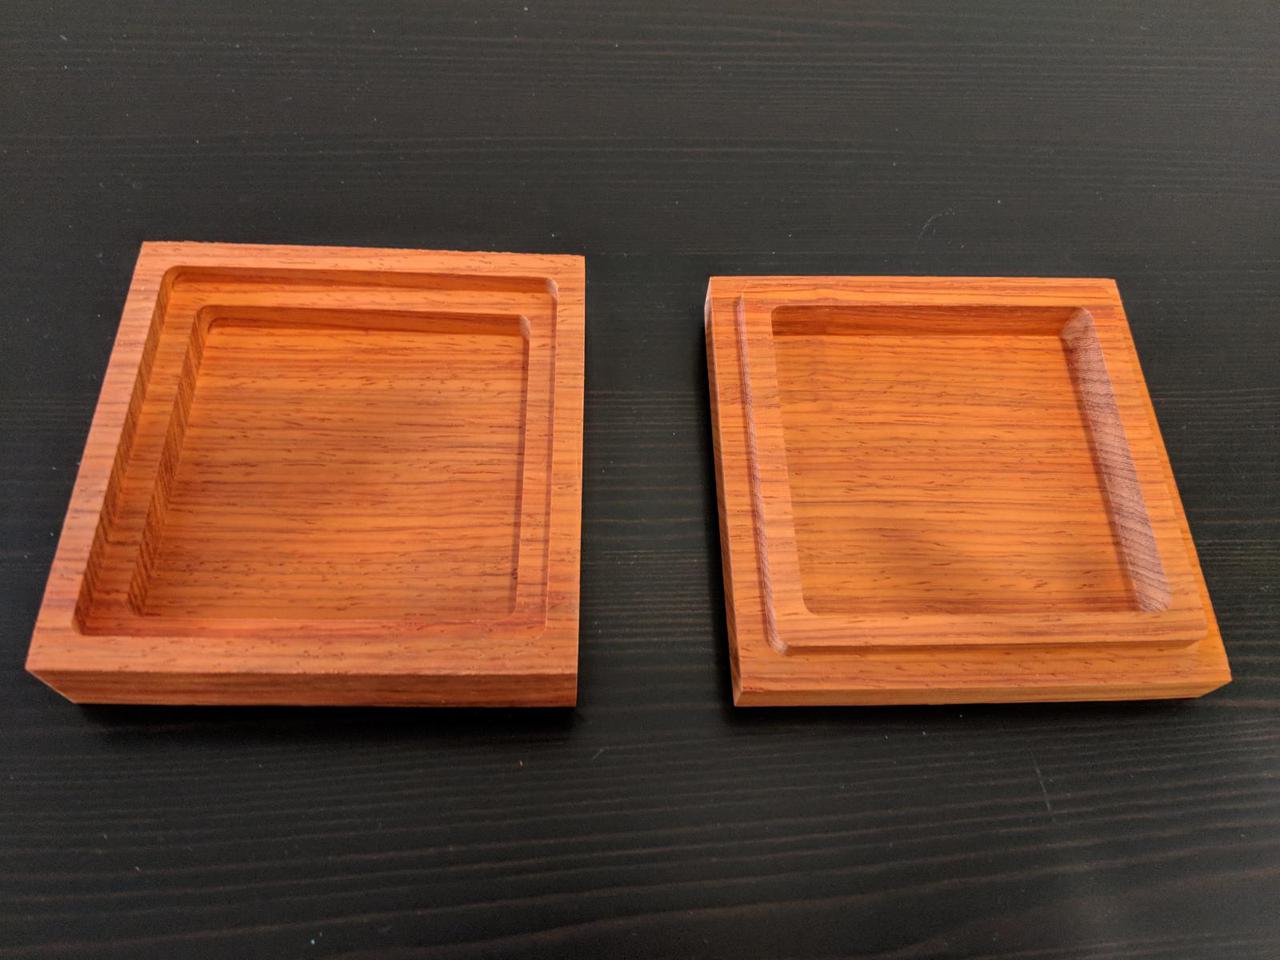
After many hours I completed the Vectorworks design. The finished box is designed to be 4" by 4" square. Both the top and the bottom are 0.85" tall. Observe the relief has two different heights.
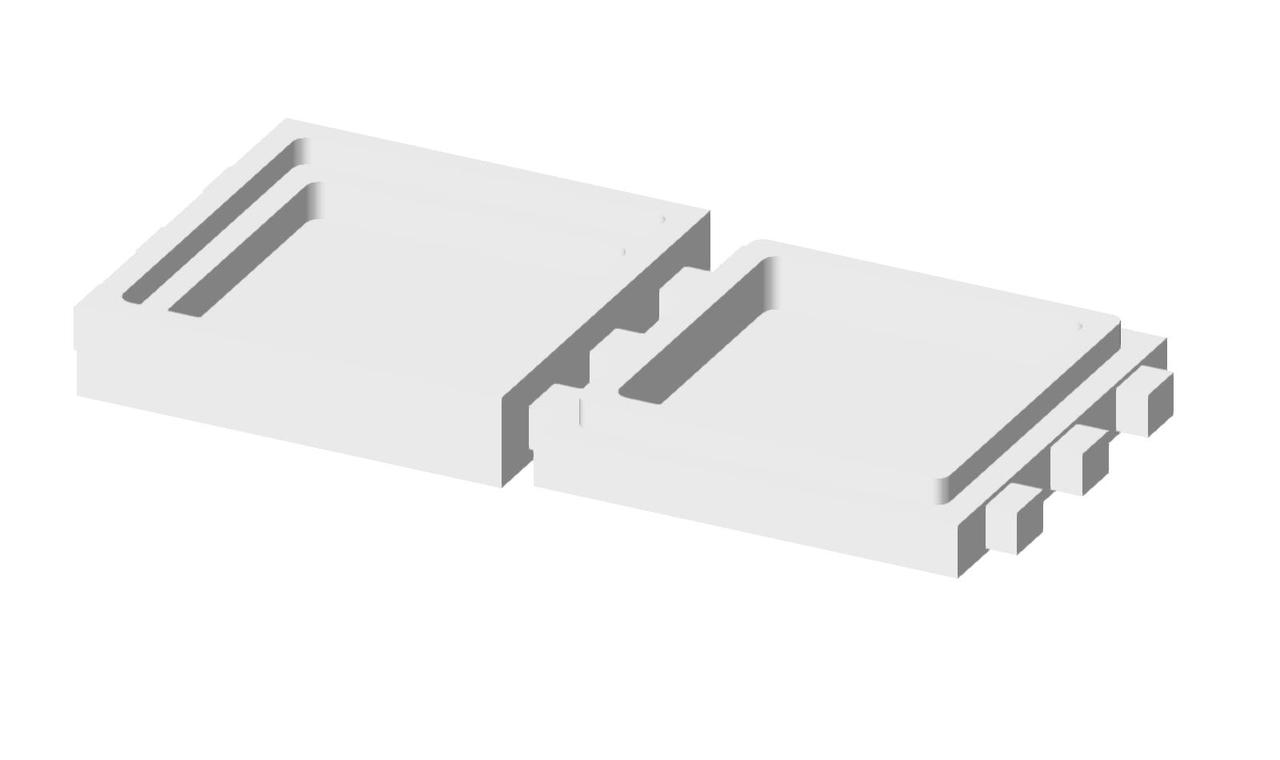
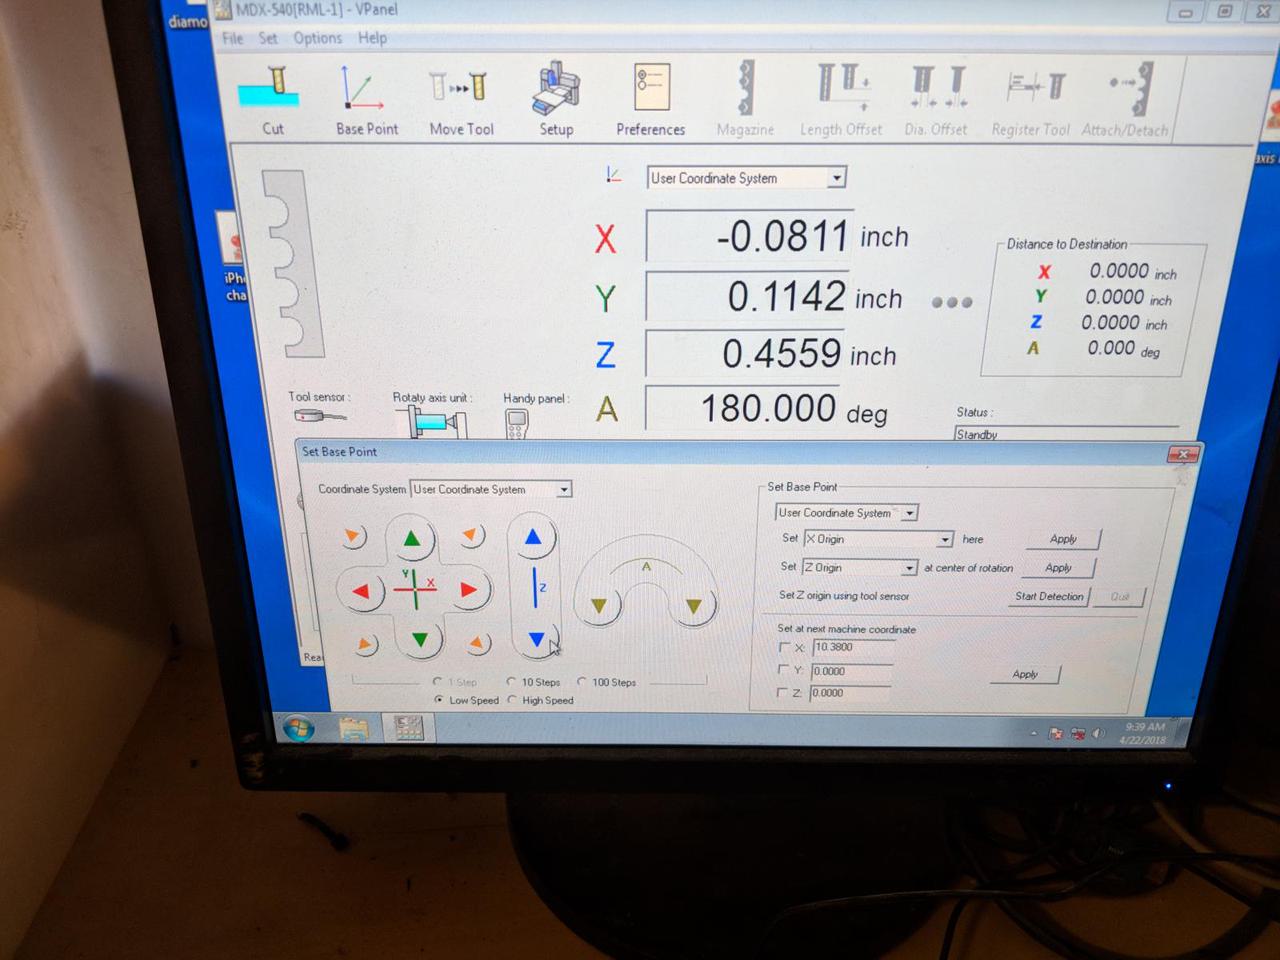
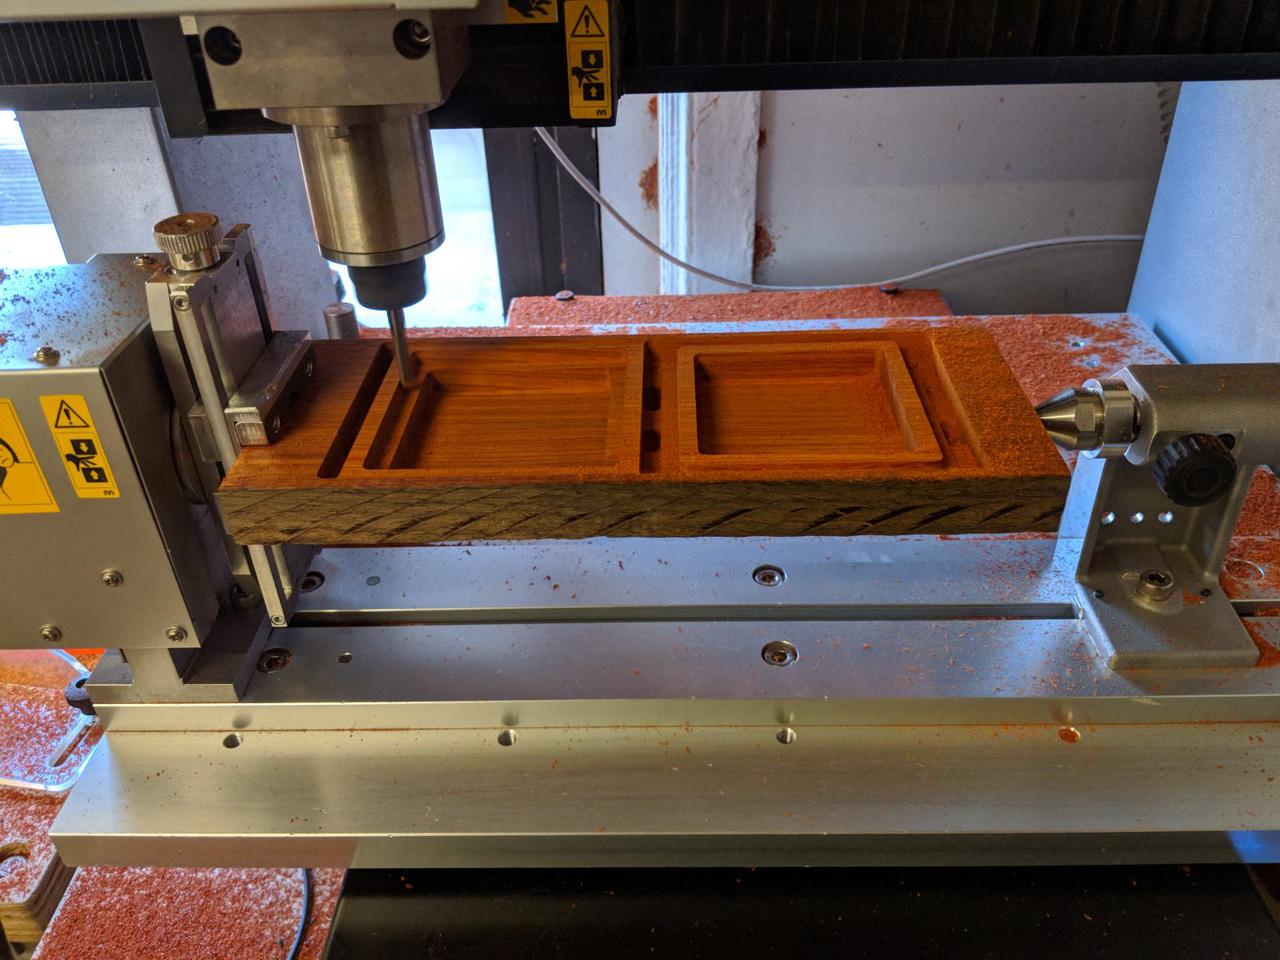
The next day I was in the shop ready to mill. Notice the wood is 0.95" thick but my parts need to be 0.85" tall. If I do a bad job of finding the center of the wood the outcome will be flawed. There's not a lot of room for error.
I realized it was possible for me to test this. After setting the X and Z origins I could position the bit right on the top surface of wood and make a note of the Z position. Then I could move the bit away, rotate the wood 180 degrees, and then again position the bit on the top surface of the wood. If I did a good job the Z positions would be very close to each other. My centering error was 0.02". This is less than the 0.05" necessary for this project to be successfully milled.
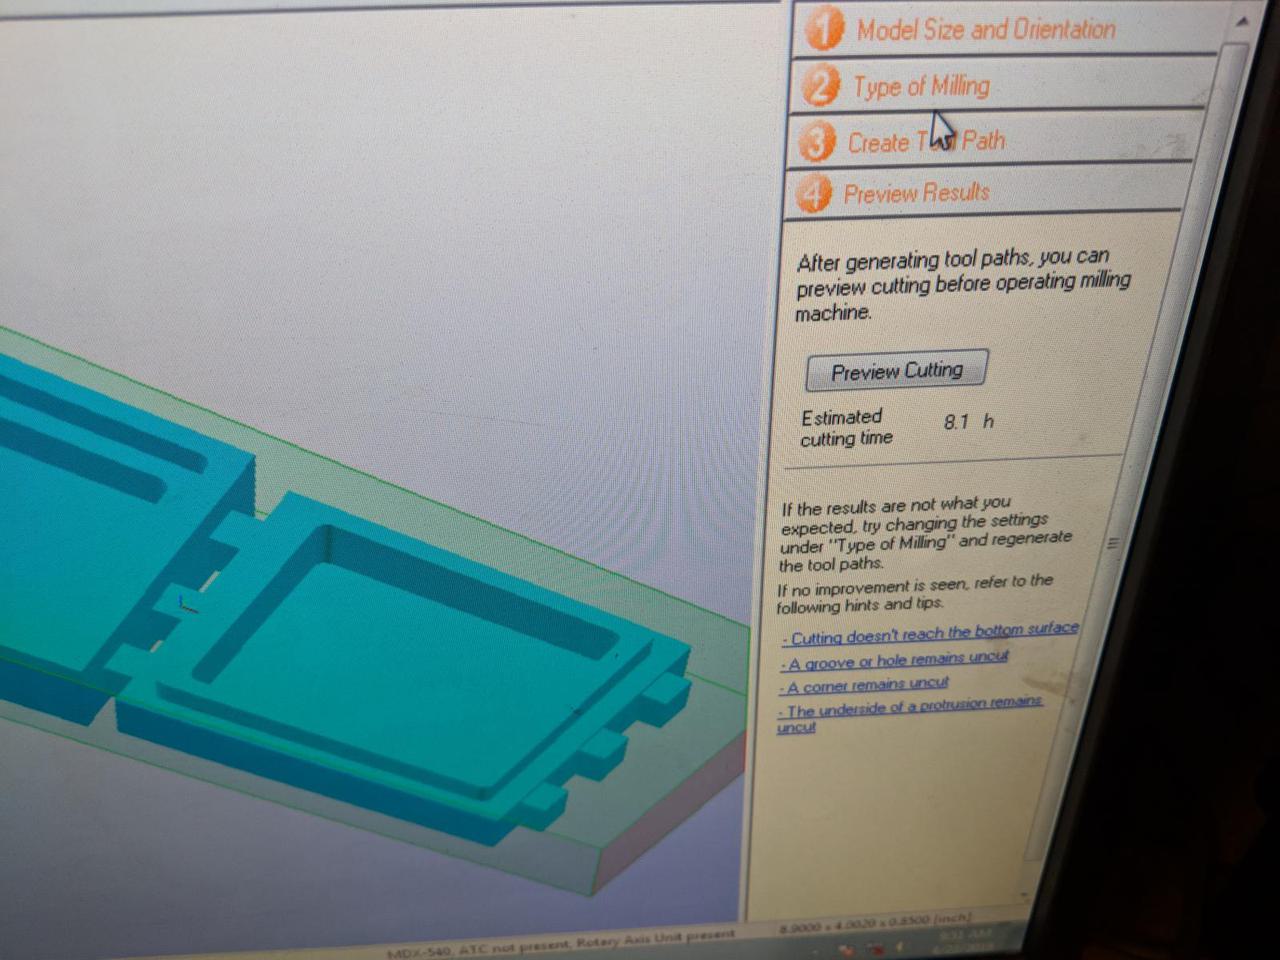
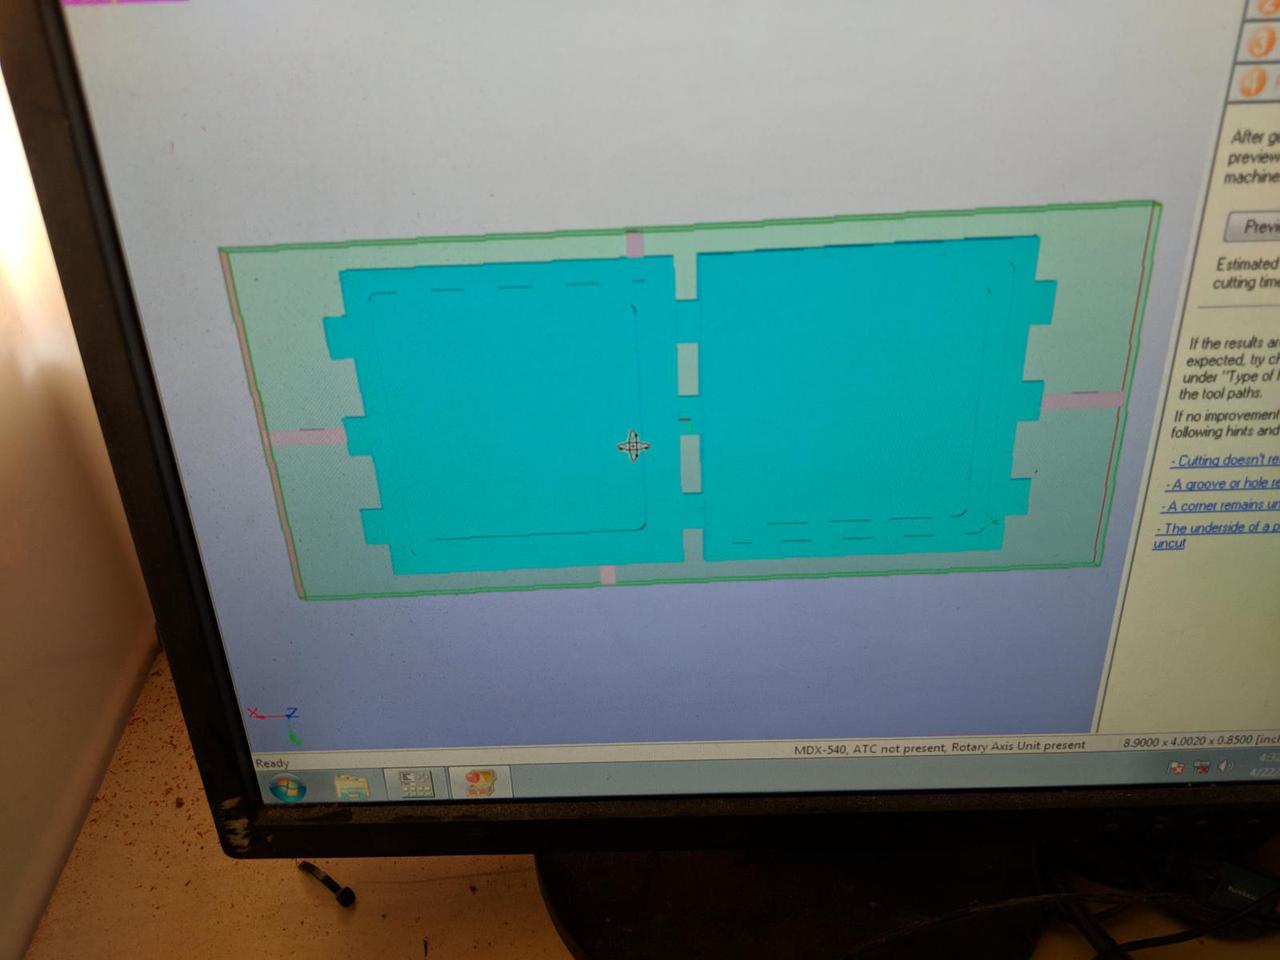
I created the job using the CAM software. When I got to the Preview Results page I saw the Estimated cutting time was 48 hours. That's ridiculous! What went wrong?
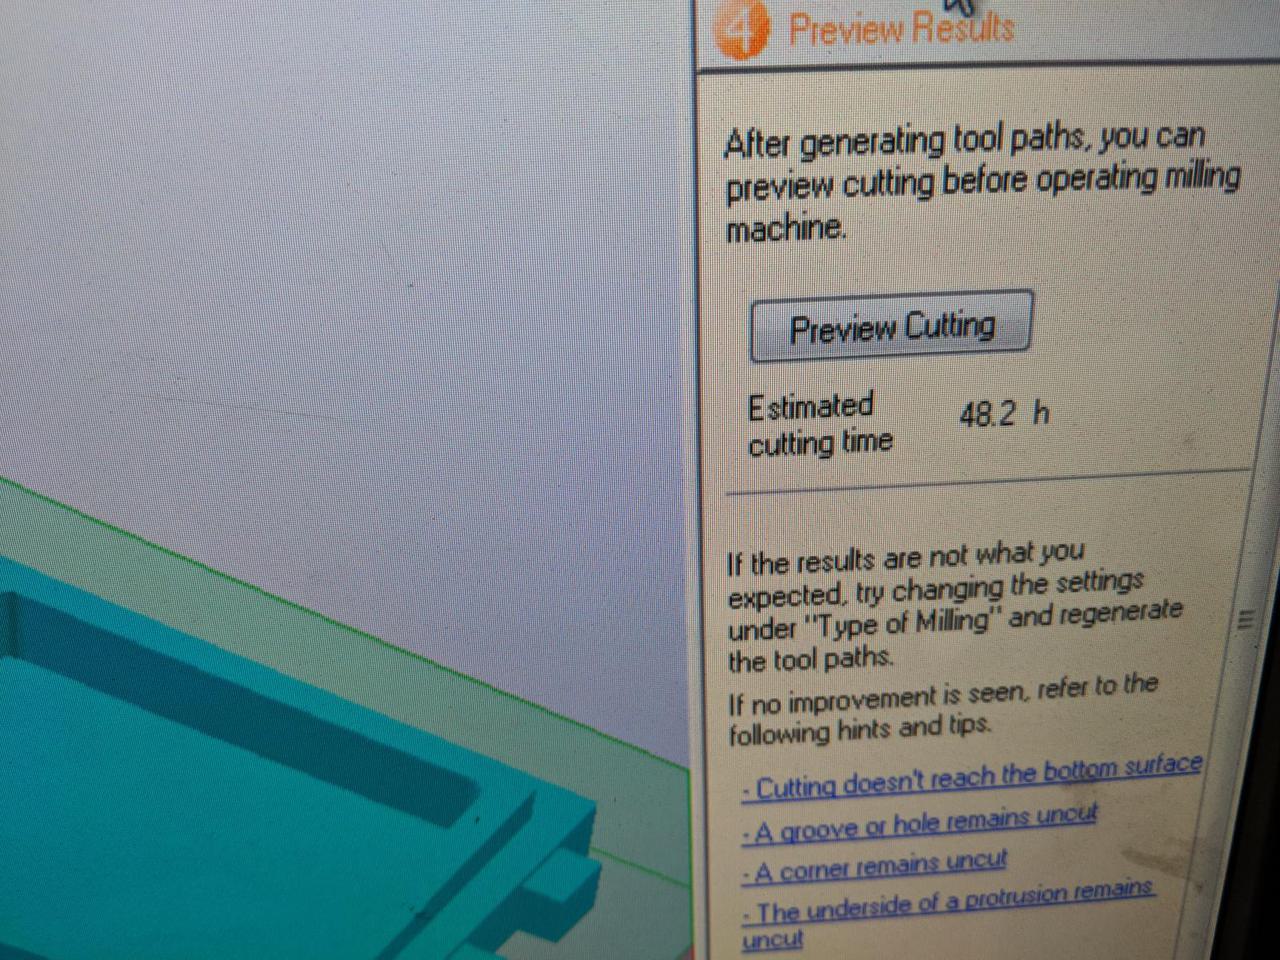
I discovered my toolpath was configured to use a bit with a diameter of 1/64". Changing that to be 1/4" brought that down a lot. It's still too slow though.
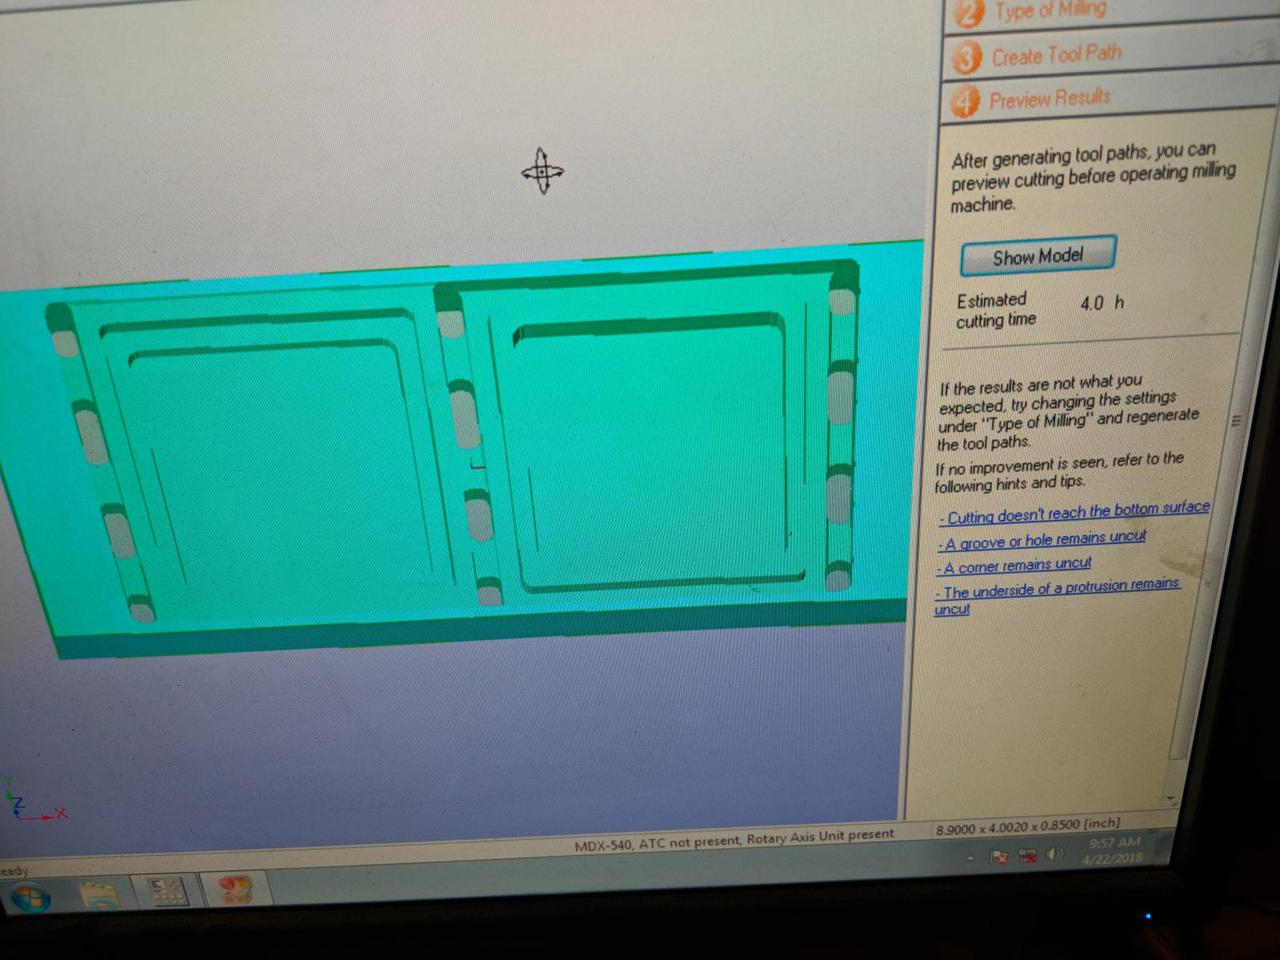
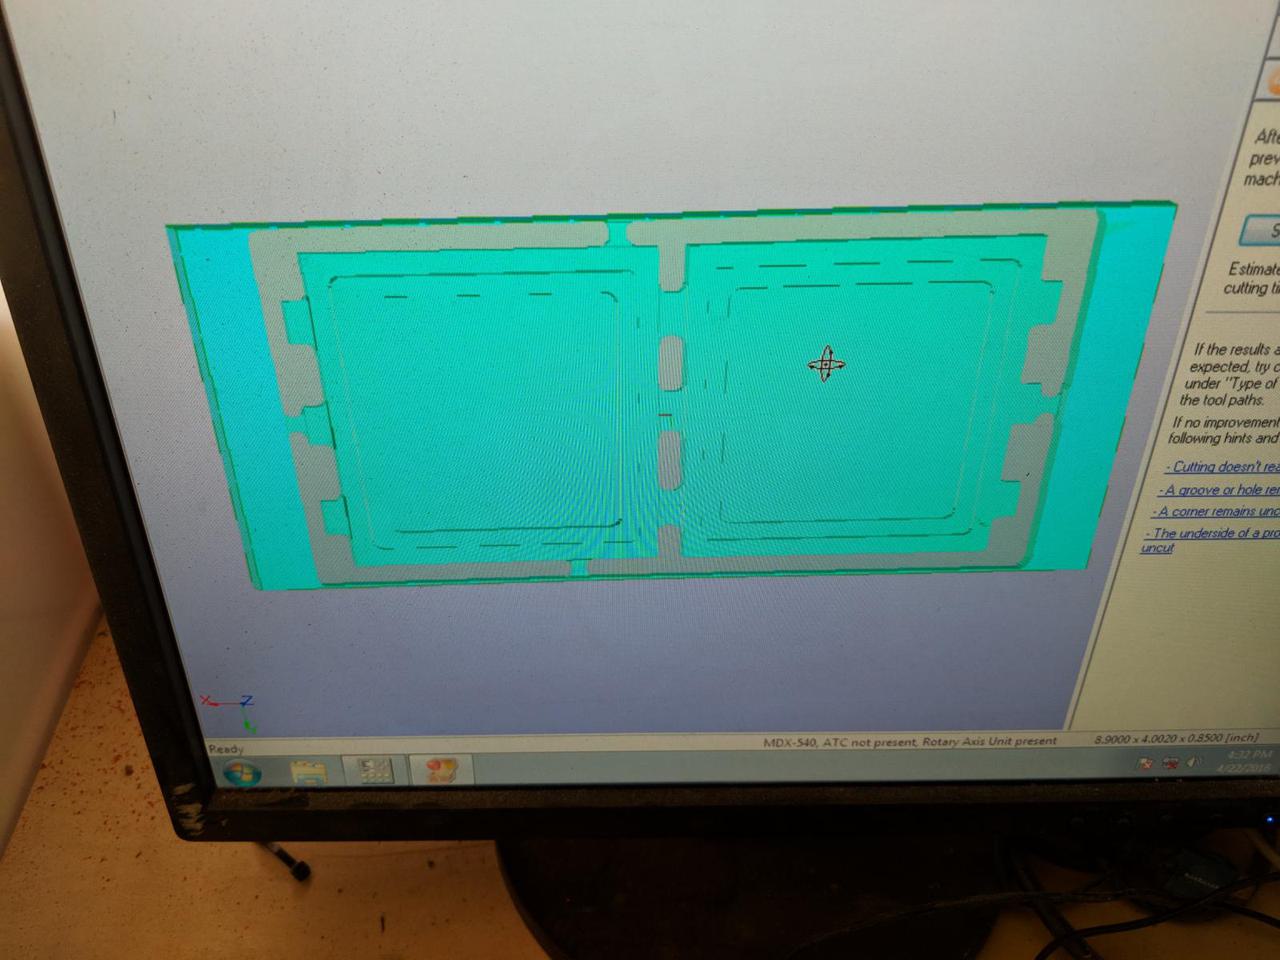
I made it faster by optimizing the job for a faster cutting time. I also added toolpaths to mill the relief on top of the box using a 1/8" bit.
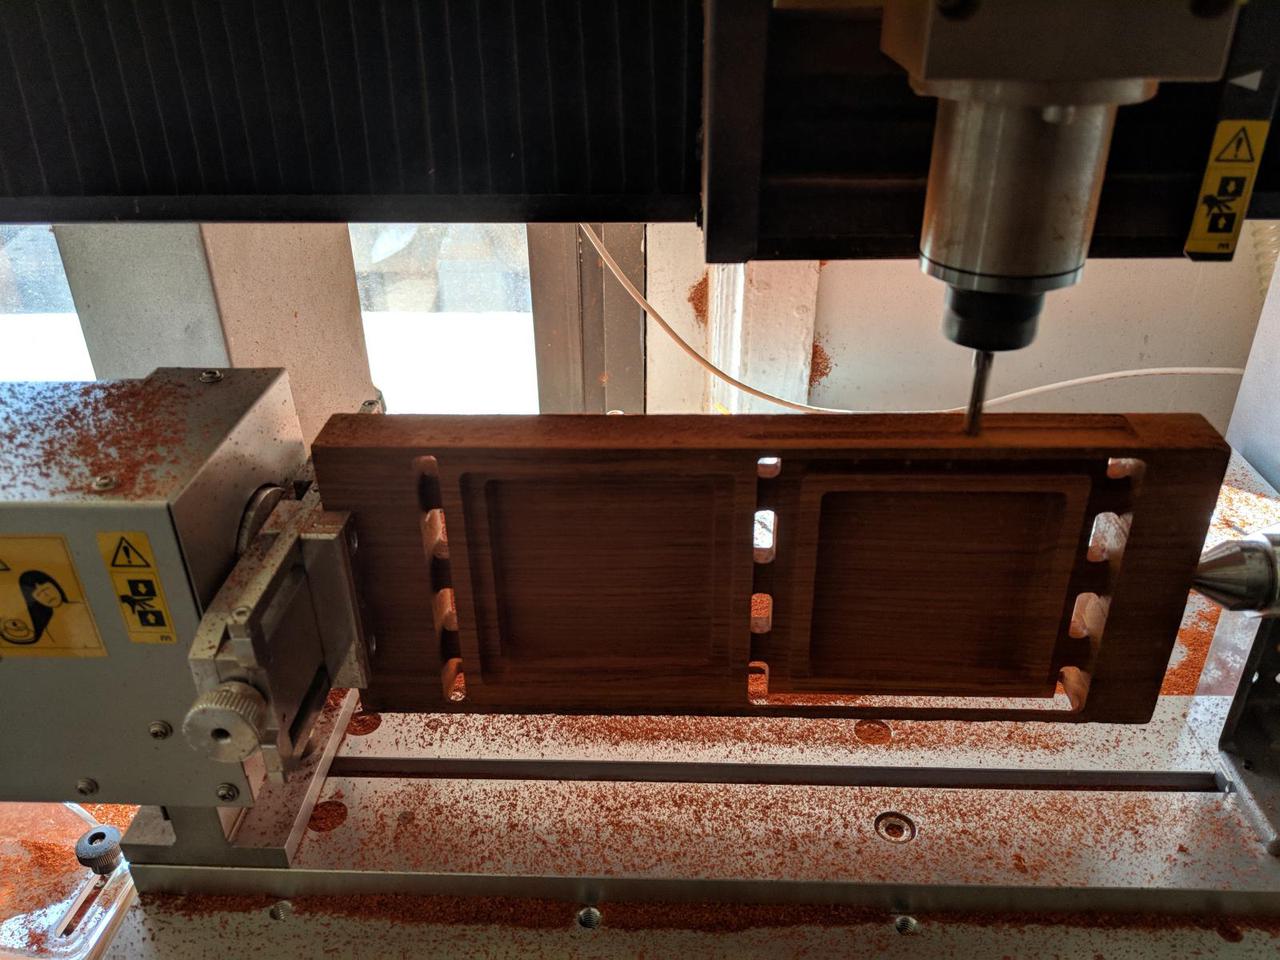
You'll also notice in this picture that I made a mistake. I didn't notice that the job was going to skip milling the sides of the box. This was a frustrating problem that I grappled with later in this project. I eventually solved it but after a bit of trial and error.
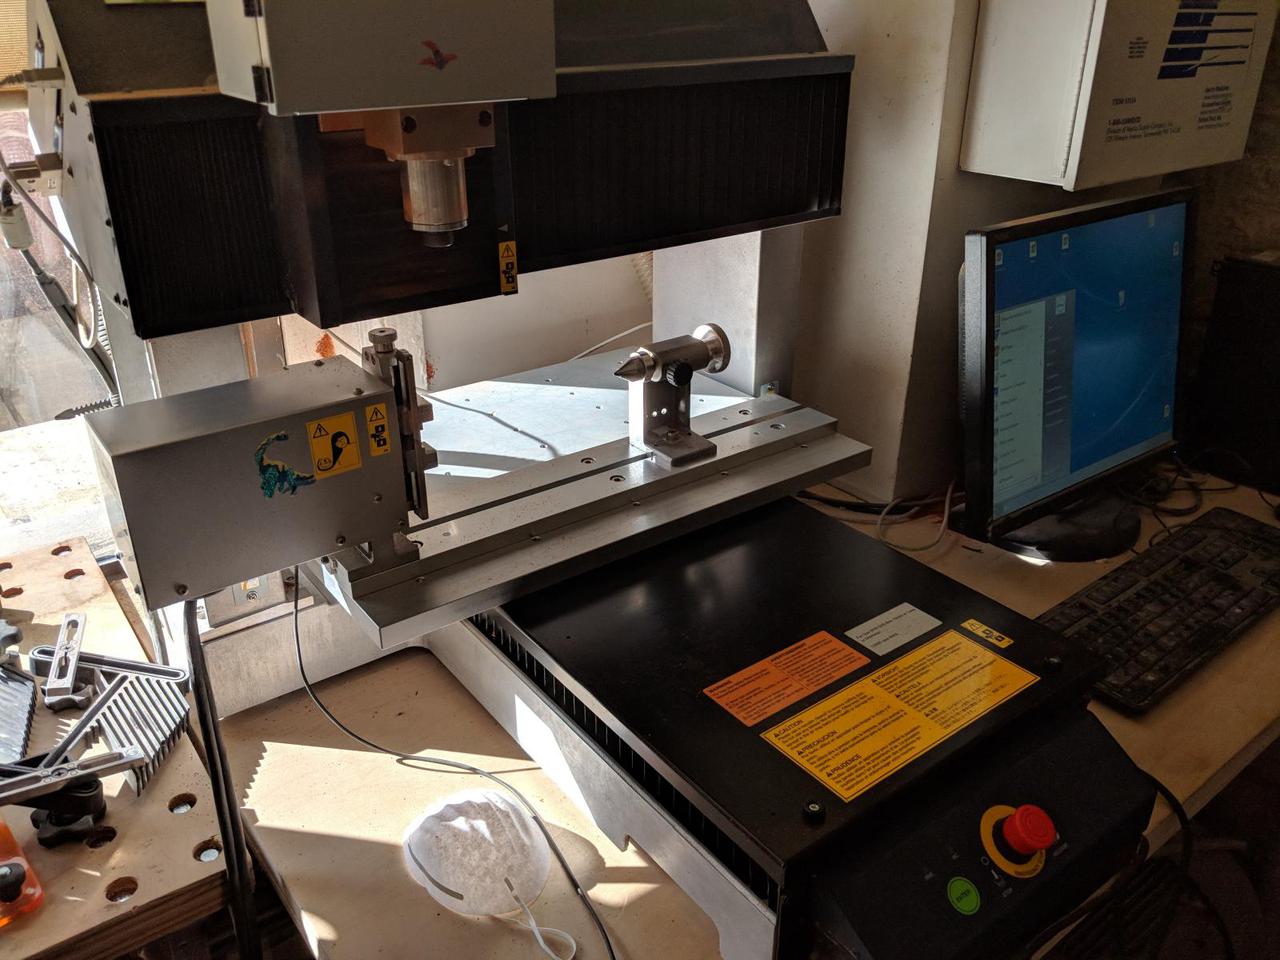
Finally, the milling begins.
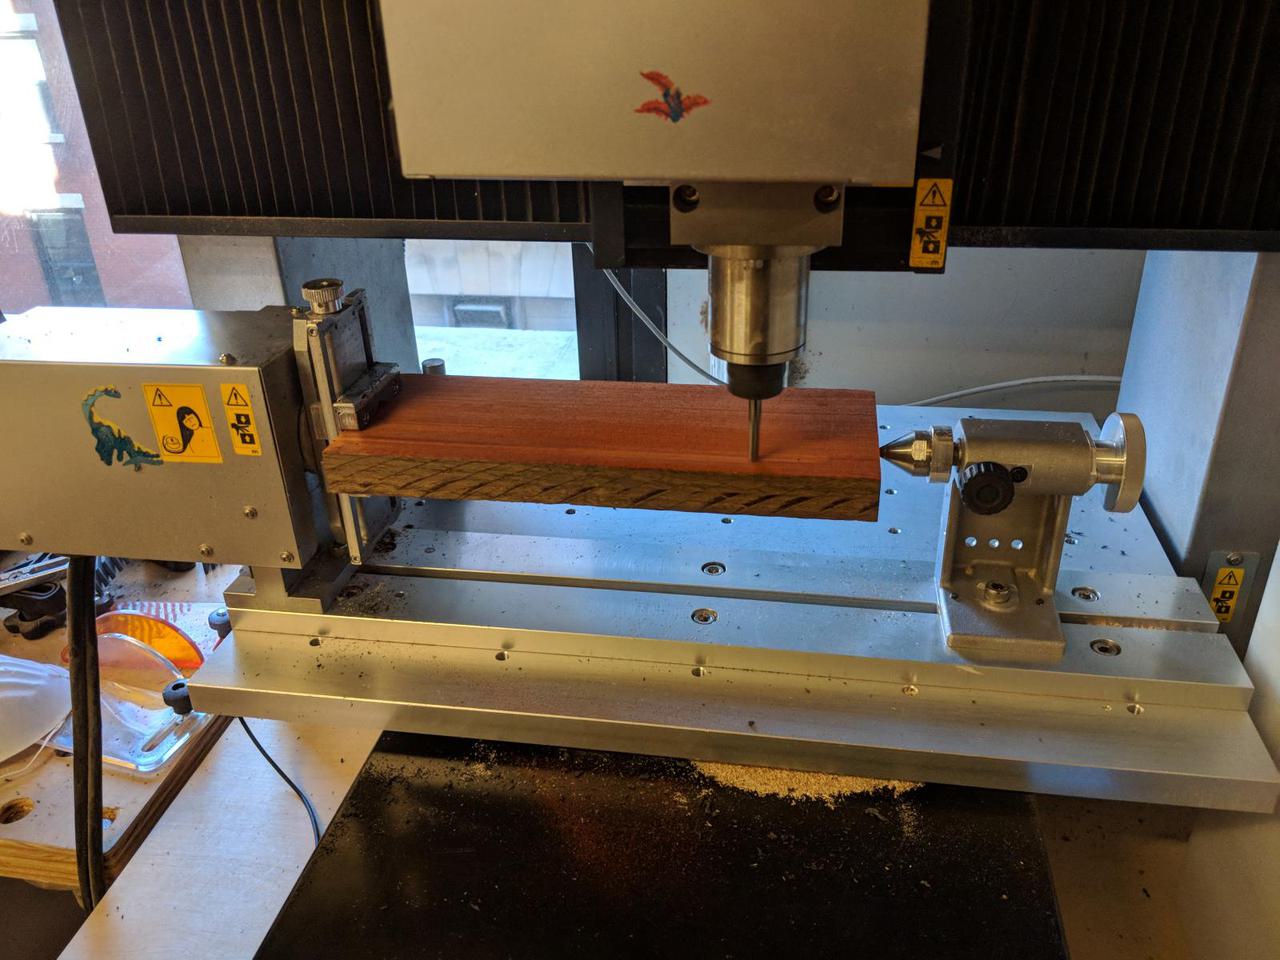
The box quickly starts to take form.
Notice I am getting red sawdust everywhere. This sawdust is a bit of a throat irritant. It was a long day.
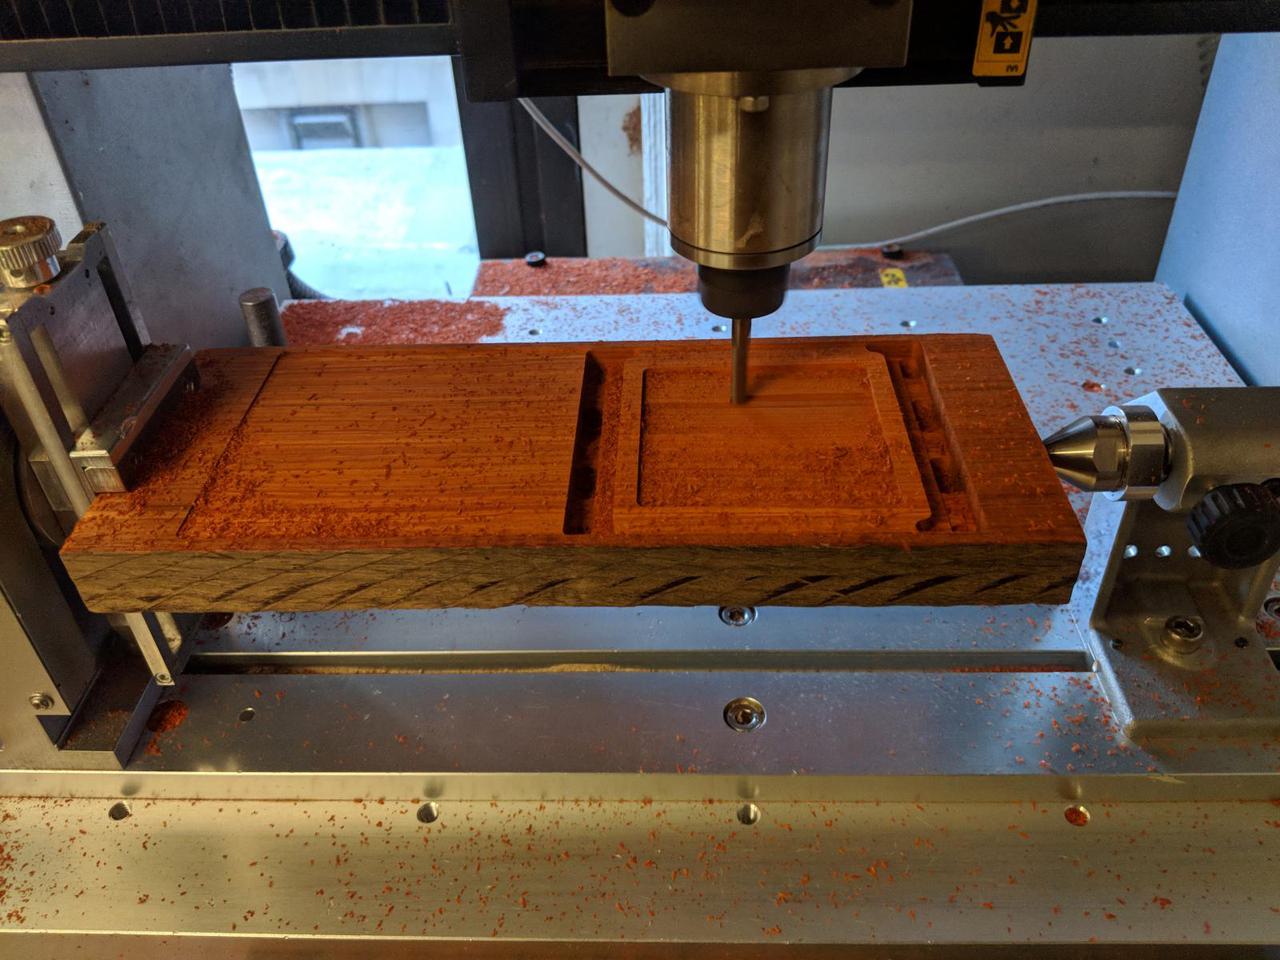
After a few hours it flipped over to do the other side.

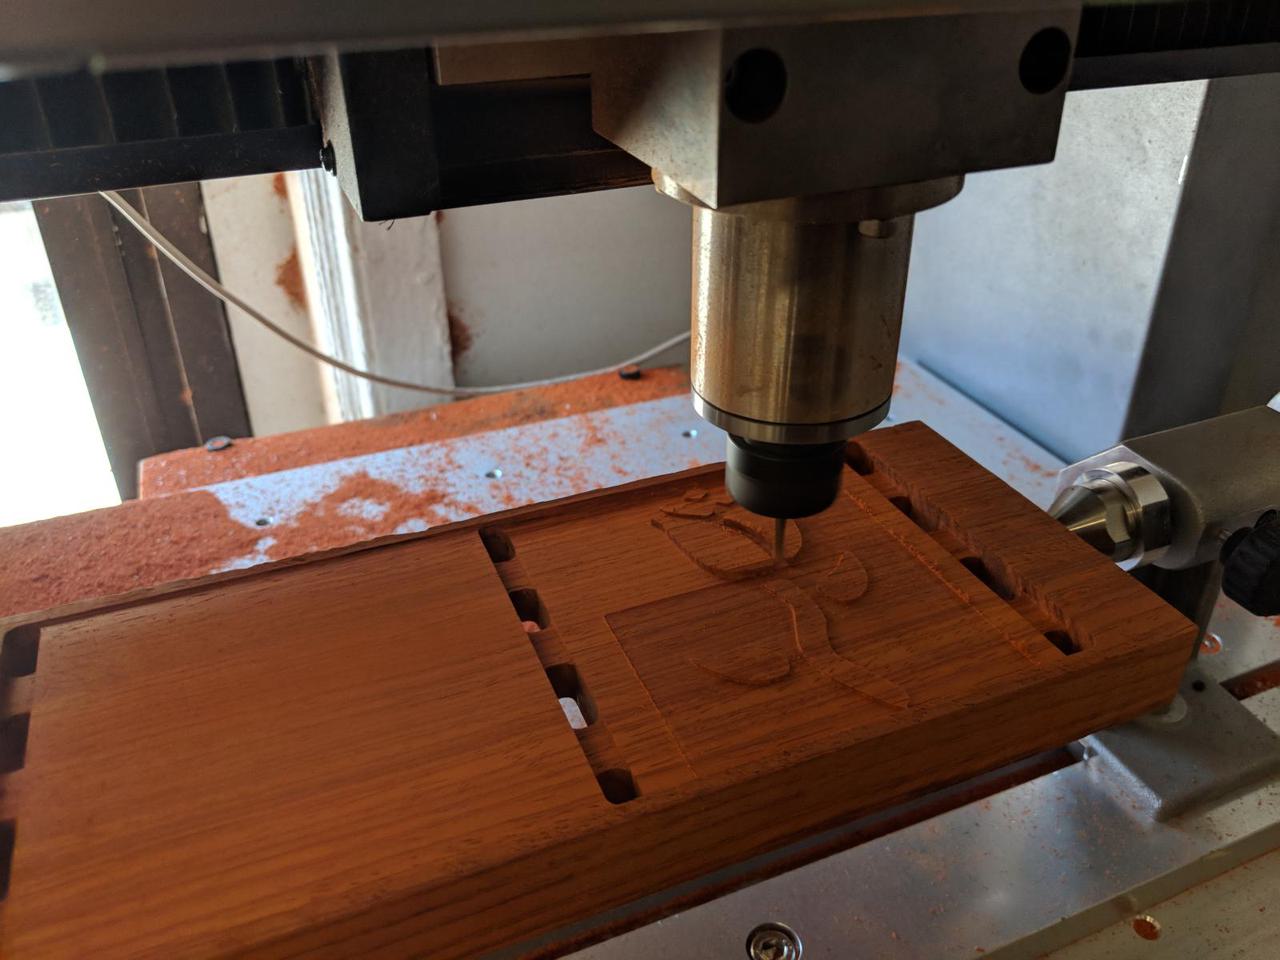
The rough cut with a 1/4" bit on the top of the box can't properly mill the rose design.
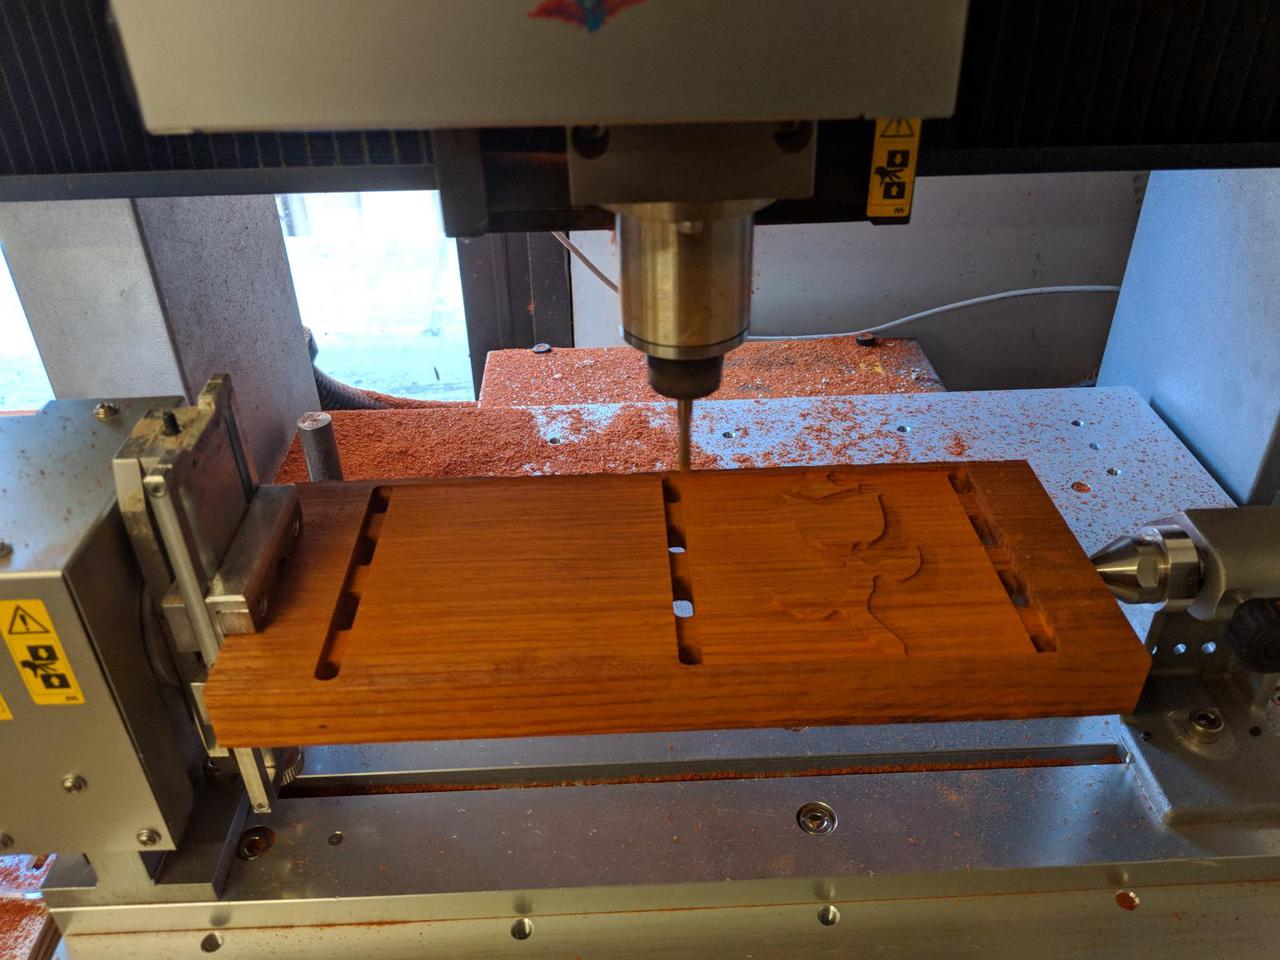
The 1/8" bit can.
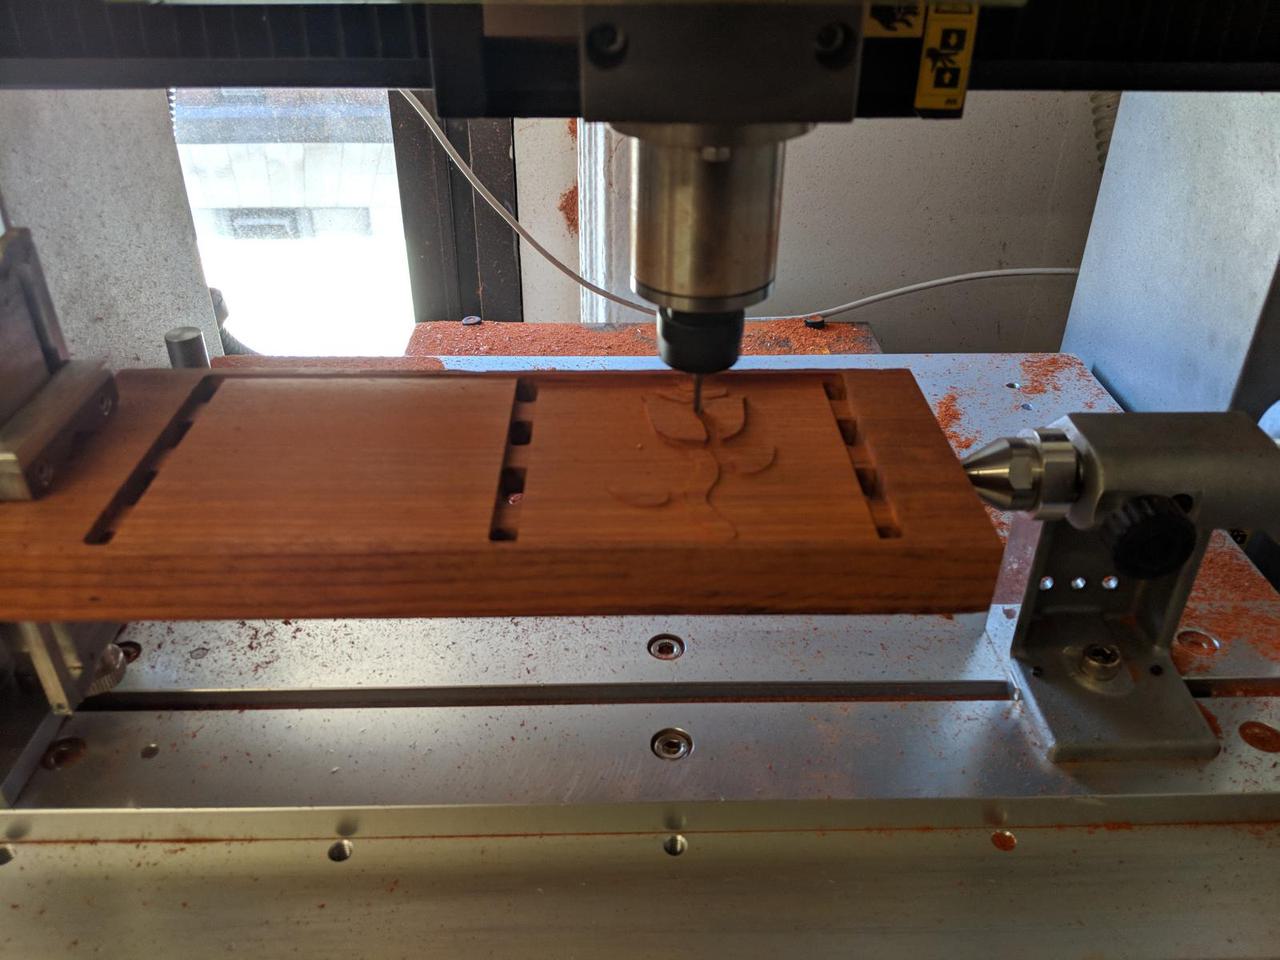
Unfortunately I made another mistake. I allowed the 1/4" bit to do a finishing pass on the top of the box. When the machine did a second finishing pass with the 1/8" bit it cut into the wood slightly farther. I also tried to be smart and make that toolpath only do the box top area near the rose design. That made it faster but left a weird boundary showing where the 1/8" bit stopped.
By this point I was pretty tired and annoyed. I ran a second finishing pass with the 1/8" bit that covered the entire top surface of the box. Also counting the incorrect finishing pass with the 1/4" bit, I sat through three finishing passes. Unfortunately the third finishing pass didn't completely remove the noticeable line from the second finishing pass. I had to get rid of that later with sandpaper.
I also wanted the mill to remove the wood from the sides. I couldn't figure out why the milling software refused to allow me to extend the milling area beyond the edge of the model. I knew I could use the belt sander to remove that material but I didn't want to do that just yet.
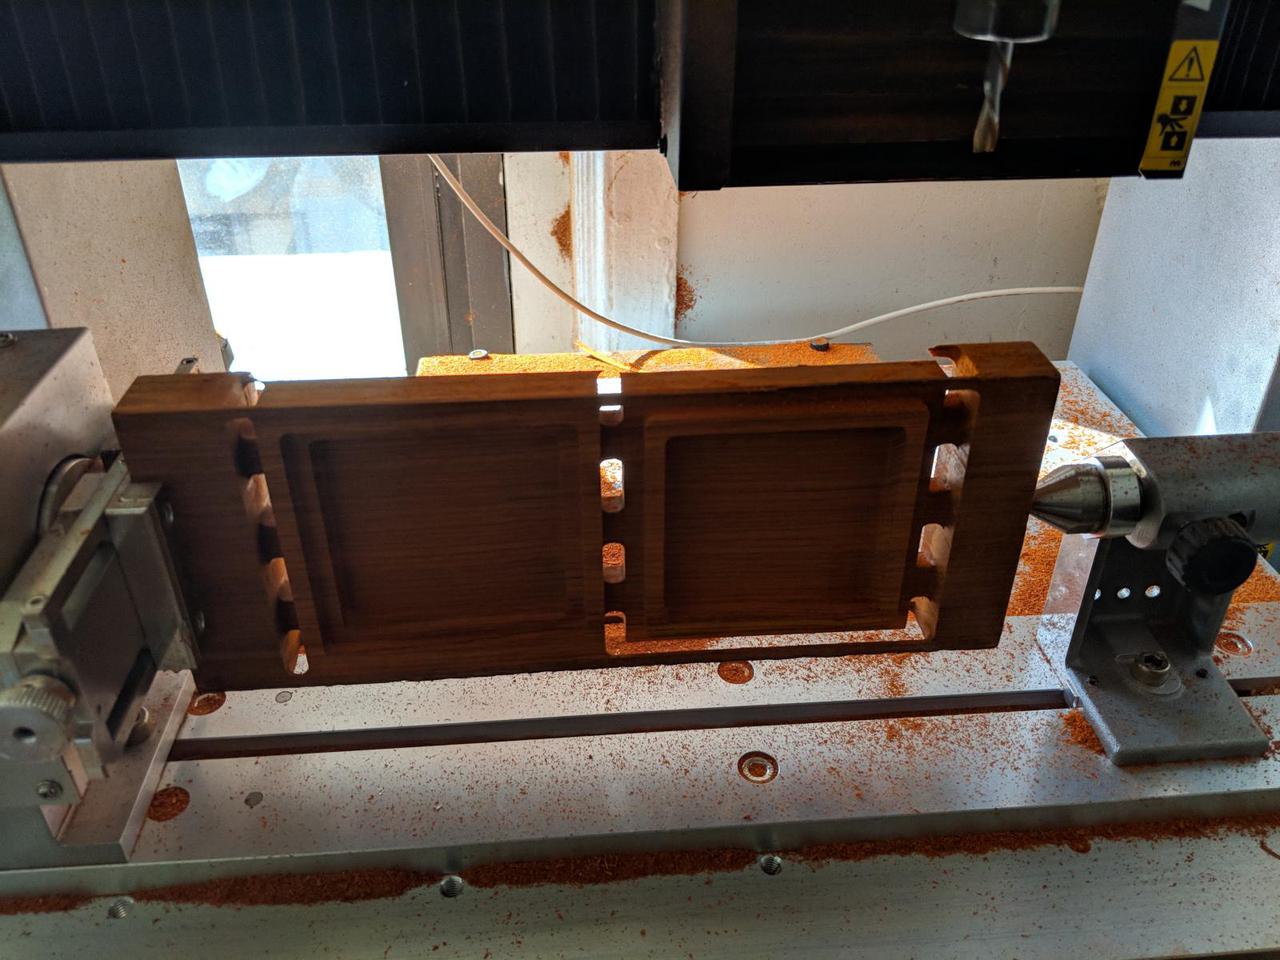
Eventually I realized I could rotate the wood 90 degrees and have the mill remove the wood from that direction.

Happily this was relatively quick.
It still didn't quite get all of it but I was done with using this machine. I had been milling for 6 hours and I had enough.
It was then I figured out what I should have done to mill the sides. When I designed the model I built my own supports. For whatever reason, the software won't mill the area outside the perimeter of the model. I discovered if I added superfluous supports to the sides it would mill out to the end of the supports. I should have done that or added superfluous supports to my design. I'll know for next time.
This is closer to what I should have seen in the morning when I started this job.
I'm done with the machine but I needed to clean up after myself. There's red sawdust everywhere.
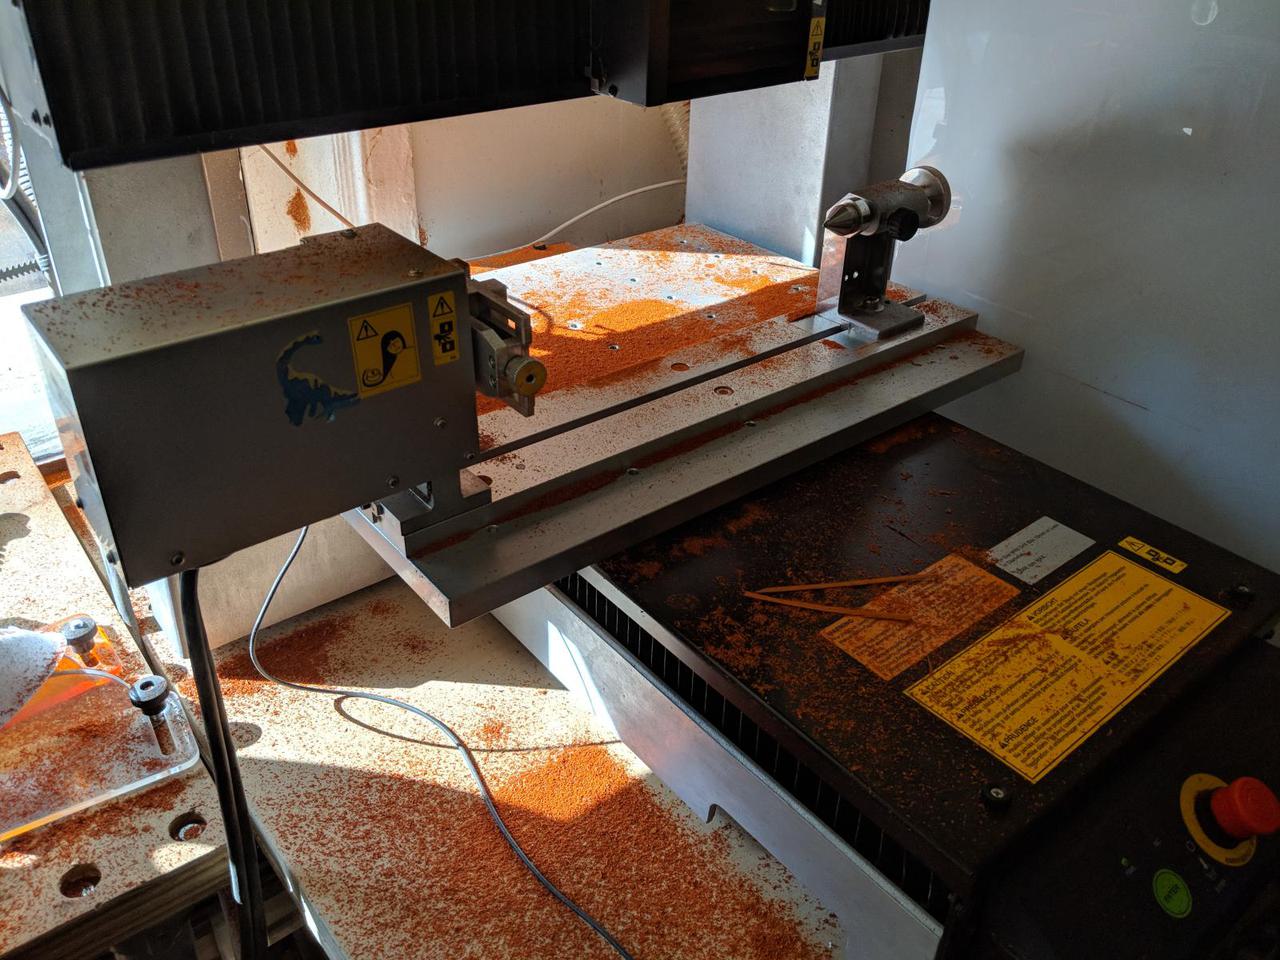
I ended up vacuuming a third of the shop to remove the red sawdust.
After vacuuming I used the band saw and the belt sander to cut and remove the supports and extra material.
The completed box looks great but there are faint lines on the top from the multiple finishing passes.
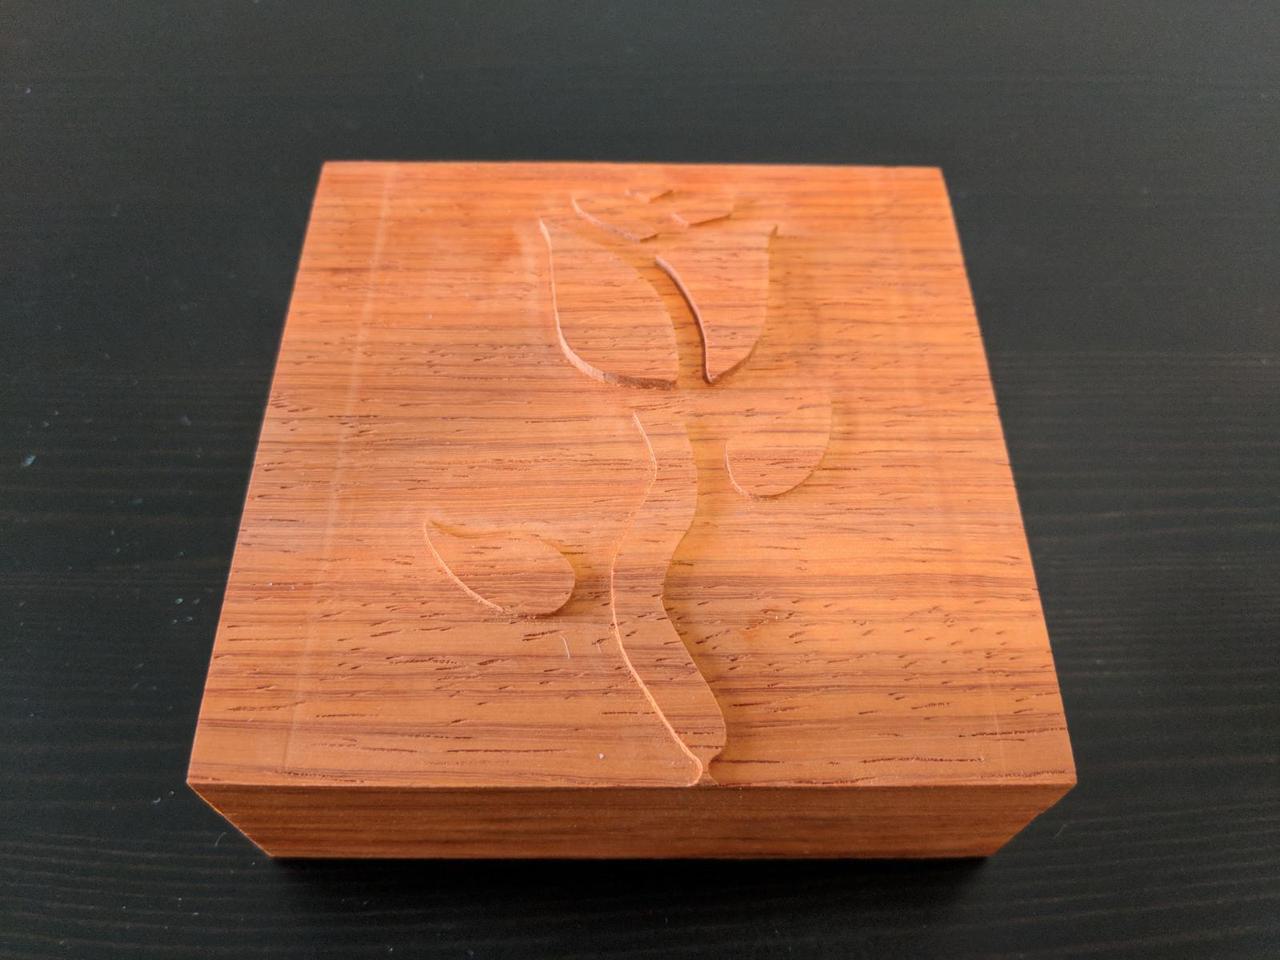
I sanded it a bit with high grade sandpaper. It seemed to help but it also started to change the look of the top of the box. Since it was impossible to sand close to the rose design I decided to stop before I made things worse.
I wanted to add varnish to the box to attempt to protect the wood color from fading. Unfortunately it is the destiny of this wood to turn brown over time. That will take many years though.
I first tested the varnish on a piece of scrap I saved from the milling job. The varnish seemed to make the wood slightly brighter.
I used two coats of varnish.
The varnish seemed to make the two lines on the top of the box completely disappear. Now I can't see them at all, even when I look very closely.
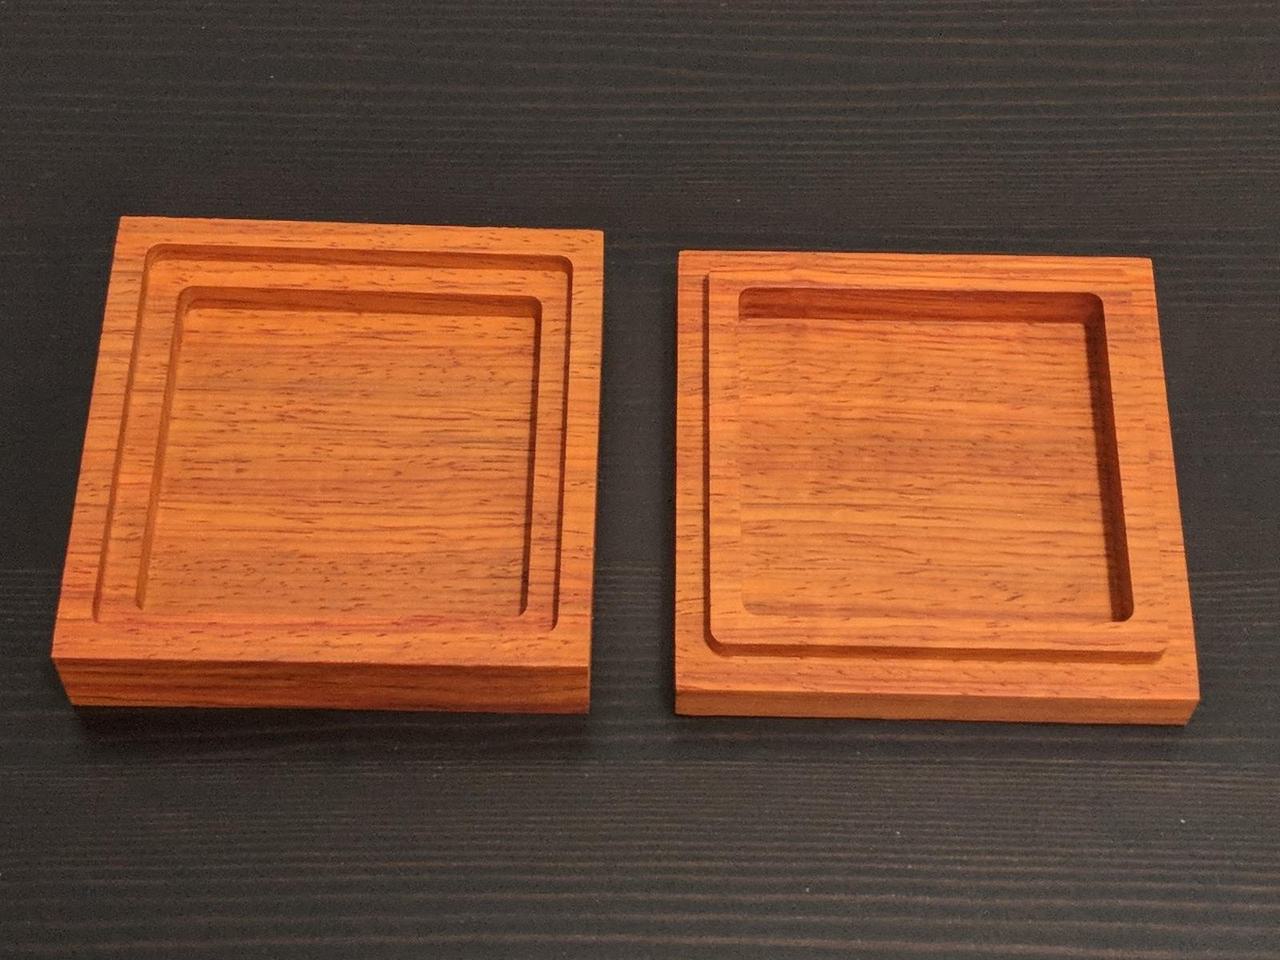
One flaw with this is the way the box top and bottom fit together. The design is square so I should be able to rotate the box top and make the pieces fit together four different ways. Unfortunately for two of the four orientations the top and bottom don't fit together. I examined my Vectorworks design and the fabricated box to understand why this is the case. My design is correct; every square is precisely a square in Vectorworks. The problem, which I discovered using digital calipers, is that the 4 axis mill did not mill precise squares. The square region where the bottom and the top meet is about 0.02" longer in the X direction than the Y direction. Thankfully the machine made the same error in both pieces so the fabricated box can still fit together.
In any case I'm very happy with the end result. After the semester is over I am going to make a similar one with the piece of Purpleheart wood I have from my previous exotic wood end-cuts purchase. I'm looking forward to using this machine a lot more in the future.
Comments