Spring Show
I created a software program to apply a Neural Style Transfer algorithm to Google Street View data to make an animation that looks like you are traveling inside a painting.
Google collects panorama photos from all around the world and makes them available through the Google Street View service. Although they visit many interesting locations, the photos often look dull. My project involves obtaining these photos through their API and using a coherent style transfer algorithm to make the sequence look like a painted animation.
Here are two examples. The first is a trip down the Hudson River in the style of Monet's Sunset on the Seine at Lavacourt (1880). I also mixed in a small amount of a photograph by Javan Ng to give the result more structure.
The second is a trip down US 12 in Idaho. The style is a mixture of Picasso's Seated Nude (1909) and a photograph by Cat Connor of a sunset at Yosemite National Park.
Here are the stylized videos side by side with the original photos from Google Street View.
All of these videos are available in a YouTube playlist.
Style Transfer Experimentation Tools
I did more than just make these two videos; I made a set of tools that can do this again and again for any location visited by Google Street View. All of the photos come from Google's Street View Image API.
Unfortunately the algorithm I am currently using to do the style transfer is extremely slow. It takes my computer several minutes or more to complete the style transfer for a single image or frame. A 60 second animation with a low frame rate of just 6 frames per second can take several days.
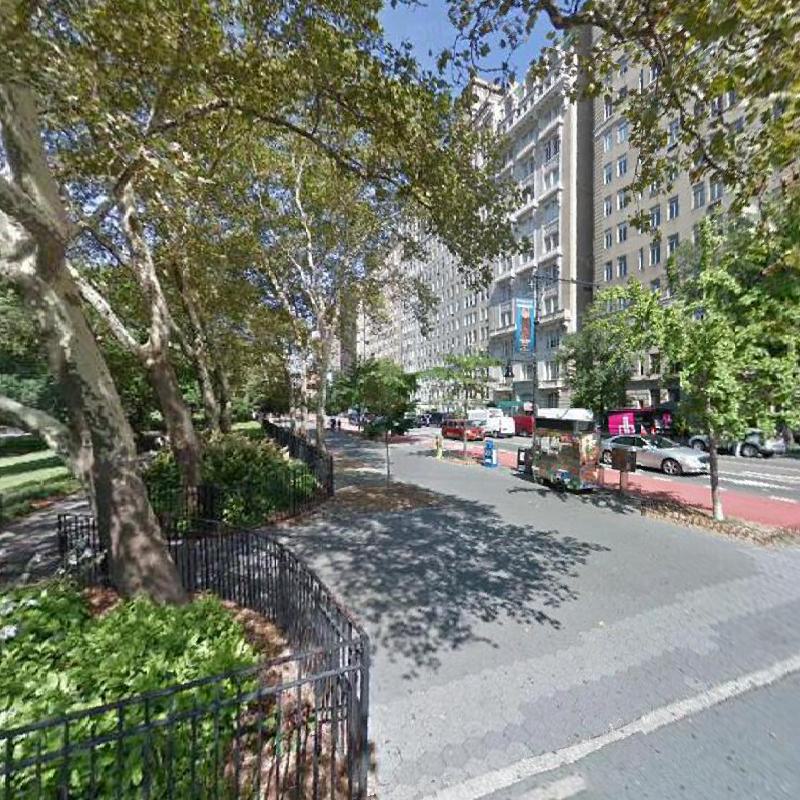
The algorithm itself is also fairly complicated with many parameters and it is anybody's guess how they affect the output. To help me learn I wrote code to help me experiment with the parameters and style inputs. For example, I can write code like this:
from common import logs
from common.params import Params
from styling import experiments

logs.setup()

content_filename = 'temp/nyc_test.jpg'

# lbfgs max_iterations tests
p = Params()
p.job_minimizer = 'lbfgs'
p.job_ftol = 1e-8

param_options = dict(job_max_iterations=list(range(1000, 3001, 250)))

experiments.param_experiments('lbfgs_max_iterations_test',
                              p,
                              param_options,
                              content_filename,
                              ['picasso_seated_nude.jpg'], [1.0])
That's all the code I need to run the style transfer algorithm multiple times with the max iterations parameter set to values between 1000 and 3000. It saves the results in an organized fashion that I can review and learn from later. Using this code I can set up an experiment, walk away to do something else, and then return later to examine the results.
Below you can see the original picture and the styled pictures, in order. You can see the style transfer does a lot at first but then slows down.
In addition, each style transfer execution gives me output like this:
input_filename: experiments/lbfgs_max_iterations_test_20180428_141633/nyc_test.jpg
input_style_filenames: [experiments/lbfgs_max_iterations_test_20180428_141633/picasso_seated_nude.jpg]
input_style_weights: [1.0]
job_device: /gpu:0
job_elapsed_time: 1948
job_max_iterations: 3000
job_minimizer: lbfgs
nn_content_layer_weights: [1.0]
nn_content_layers: [conv4_2]
nn_content_loss_function: 1
nn_style_layer_weights: [0.2, 0.2, 0.2, 0.2, 0.2]
nn_style_layers: [relu1_1, relu2_1, relu3_1, relu4_1, relu5_1]
weight_content: 5.0
weight_style: 10000.0
weight_tv: 0.001
The Params class you see above can read these yaml files and use the contents to reproduce any of the results. For any output I always have a record of how it was made.
Here's another test that styles the same picture with various proportions of Picasso's Seated Nude and an Ansel Adams photograph.
p = Params()
p.job_max_iterations = 2000
p.job_ftol = 1e-6

experiments.style_mix_experiments('nyc_picasso_adams_mix_test',
                                  p,
                                  content_filename,
                                  'picasso_seated_nude.jpg',
                                  'ansel_adams_oak_tree_storm.jpg',
                                  step=0.2)
And the results:
Everything described above also applies to video styling as well. All of the experimentation and record keeping is done in an organized and clear format.
Cloud Computing
The process of stylizing each frame of a video is very slow. For various reasons I didn't have a lot of time to create the actual videos I put in this show. To speed the process along I used cloud resources to accelerate the work. To manage the cost of those cloud resources and cope with shifting availability I used AWS, GCP, and Paperspace and moved each job from one location to another. This was a hassle but in retrospect it gives me an interesting opportunity to compare the cost and performance of the various resources.
Interestingly Paperspace's ML in a Box (VOLTA V100) template ostensibly offers the same hardware as AWS' p3.2xlarge instance but my code ran 22% faster on AWS. Both setups provide 8 CPUs and one NVIDIA V100 GPU. While monitoring the machines I noticed that the CPUs were consistently above 90% utilization on Paperspace, suggesting that Paperspace offers inferior CPUs. The slower performance almost completely negates the lower cost of Paperspace.
On AWS the CPU utilization was around 50% and the GPU utilization ranged from 30 to 60%. I was hoping the GPU utilization would be higher because then I would feel like I am getting my money's worth with the hardware. The lower utilization of the CPU and GPU suggests the bottleneck is somewhere else, perhaps in my code. This is something I'll explore later.
Using cloud resources for this project was fun and educational but I doubt I'll make a habit of it to do style transfers. There's nothing about this that has any kind of time urgency. I'm almost always going to be fine with doing this at home with my NVIDIA 1080 Ti GPU. The urgency of getting something done in time for the Spring Show meant I needed more than what my hardware at home can achieve, and that's why I used it.
Given the superior benchmarks of the V100 one might expect it to provide more of a performance improvement over the 1080 Ti. In general it is my belief that using advanced hardware like V100s is acceptable but only after making an effort to optimize one's algorithms and code. For a lot of reasons I believe that the hardware is underutilized here and there is a lot I can do to make this faster. Going forward I'll be exploring that and not using V100 GPUs.
Next Steps
My most important next step is to improve algorithm performance. My current idea is to use some kind of progressive image resizing to accelerate the early stages of the optimization. My initial attempts at implementing this didn't work as well as I hoped. It failed because of some details about how the optimization function works; I'll explore this later in the summer.
My code uses the algorithm described in Ruder, Dosovitskiy, and Brox's paper Artistic style transfer for videos. There are other papers that describe completely different approaches that I will learn more about and experiment with. There's still a lot more for me to learn from the current paper though so I am going to stick with it before I move on to others.
I also want to switch from TensorFlow to PyTorch. I think PyTorch will put me in a better position to experiment with the code in the way I'd like.
Finally, I would like to apply these tools to 360 Videos. This was my original goal for this project. Doing such a thing would be amazing but would take much more computation time than what is really feasible right now. Nevertheless, I hope to achieve this by the end of the summer.
Comments