Improved Model and Final Project Ideas
Improved 3D Speaker Case
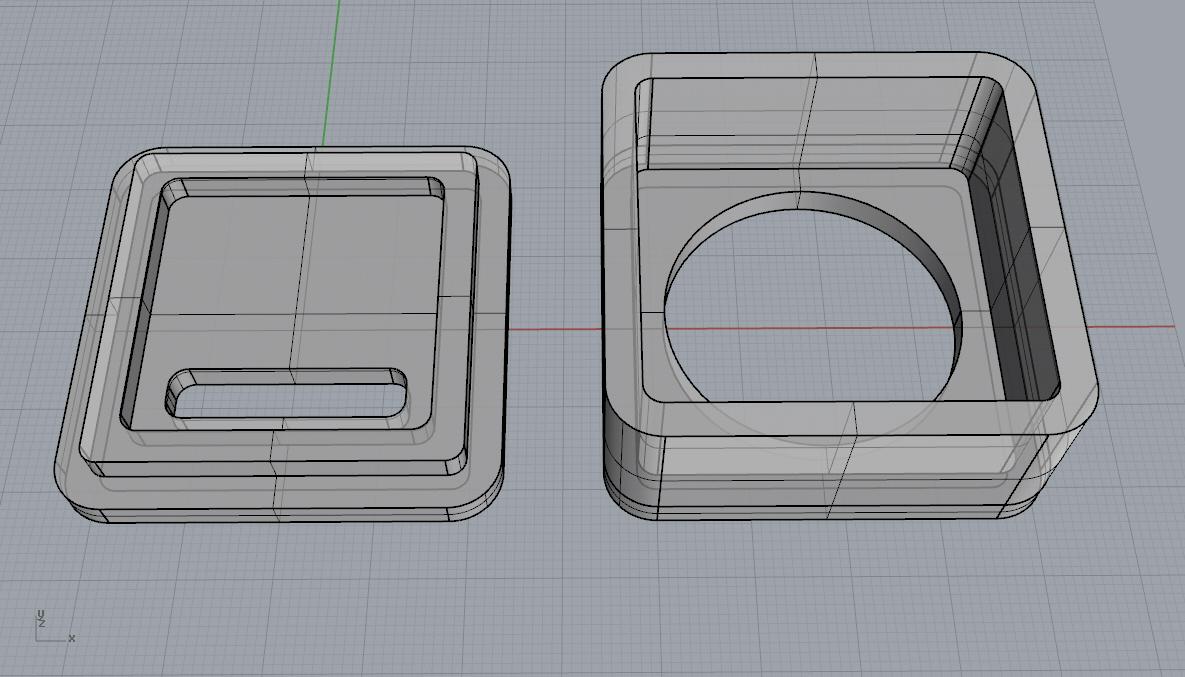
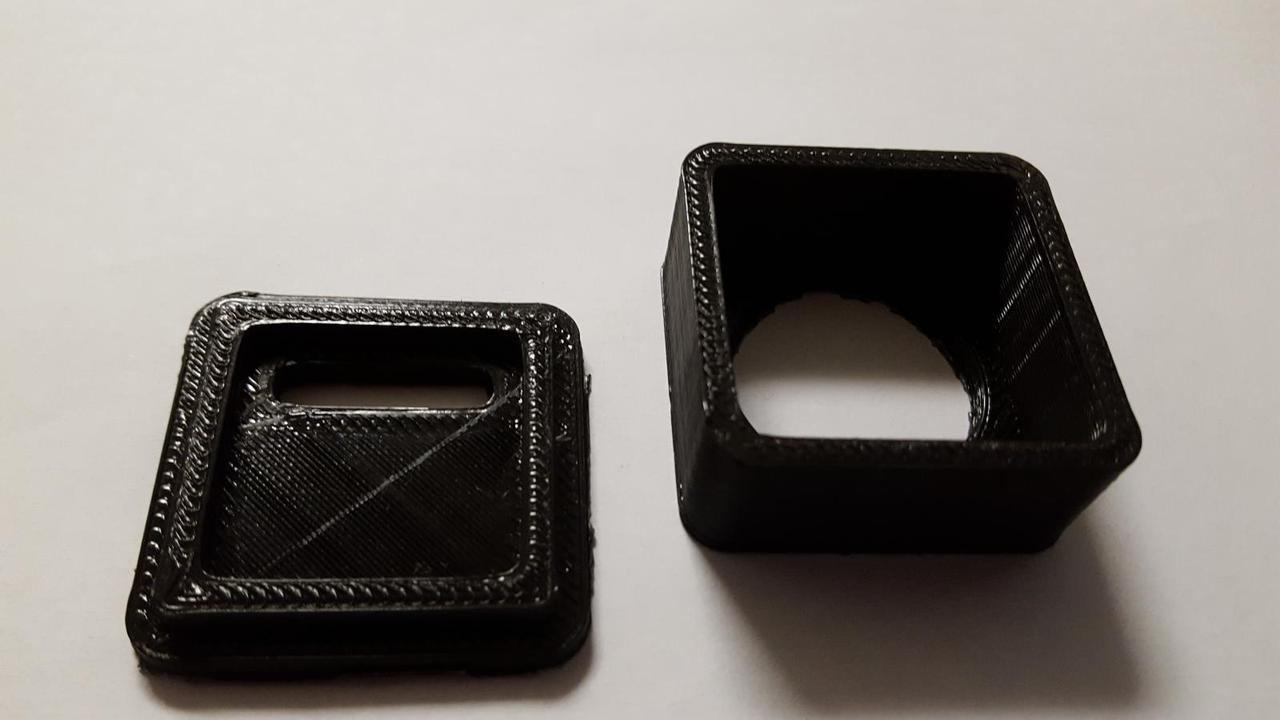
Previously I designed and printed a 3D speaker case to use in my Physical Computing class. The speaker case worked well but I made a design error in Rhino. The front opening for the speaker was smaller than I intended it to be. All I had to do is make the opening larger and print out a new one. Sounds simple right? How could this possibly go wrong?
The redesign in Rhino was straightforward:
Next, I proceed to the 3D printer. This time I used the Ultimaker 2+ printer with a 0.6mm nozzle. Previously I used the Ultimaker 2+ Extended printer with a 0.4mm nozzle. Since my model isn't particularly detailed I thought I could save myself some time printing with a 0.6mm nozzle printer and lower resolution settings.
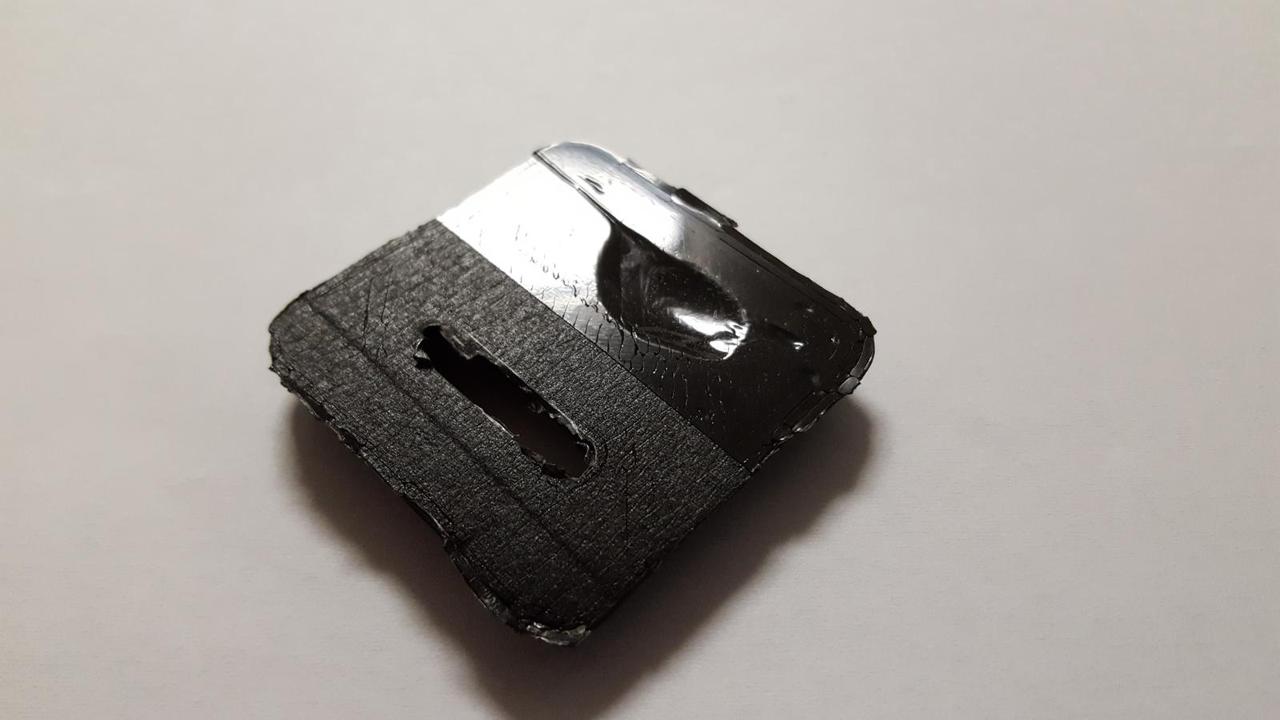
My first attempt at printing ended in a disaster. The printer was loaded with NinjaTek Cheetah flexible filament instead of PLA. The printer was configured to use PLA and my Cura G-code was written for PLA but the printer was using a very different material. I knew something looked odd from the beginning but I let it continue. When the print's sidewalls fell apart it was clear something was wrong and there was no way this would be usable.
On the plus side, I now have an idea what the NinjaTek material can do. It is an interesting material and I will save the failed print to inspire future project ideas.
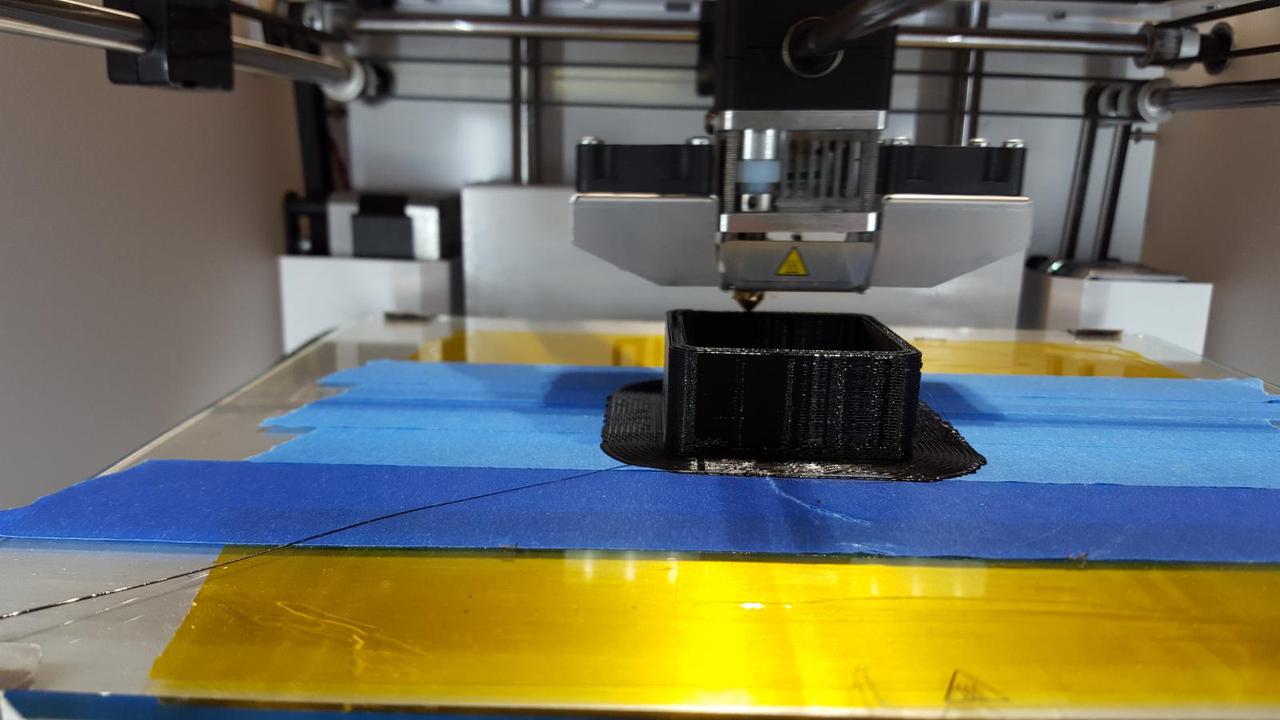
After getting help from the shop staff I printed again. This time there was an aberrant bubble in the tape put down on the printer bed by a previous user and my print was printing on top of the bubble. I also removed my print from the bed before it had enough time to cool and caused a small warp. Another unusable print.
I replaced the tape and printed again.
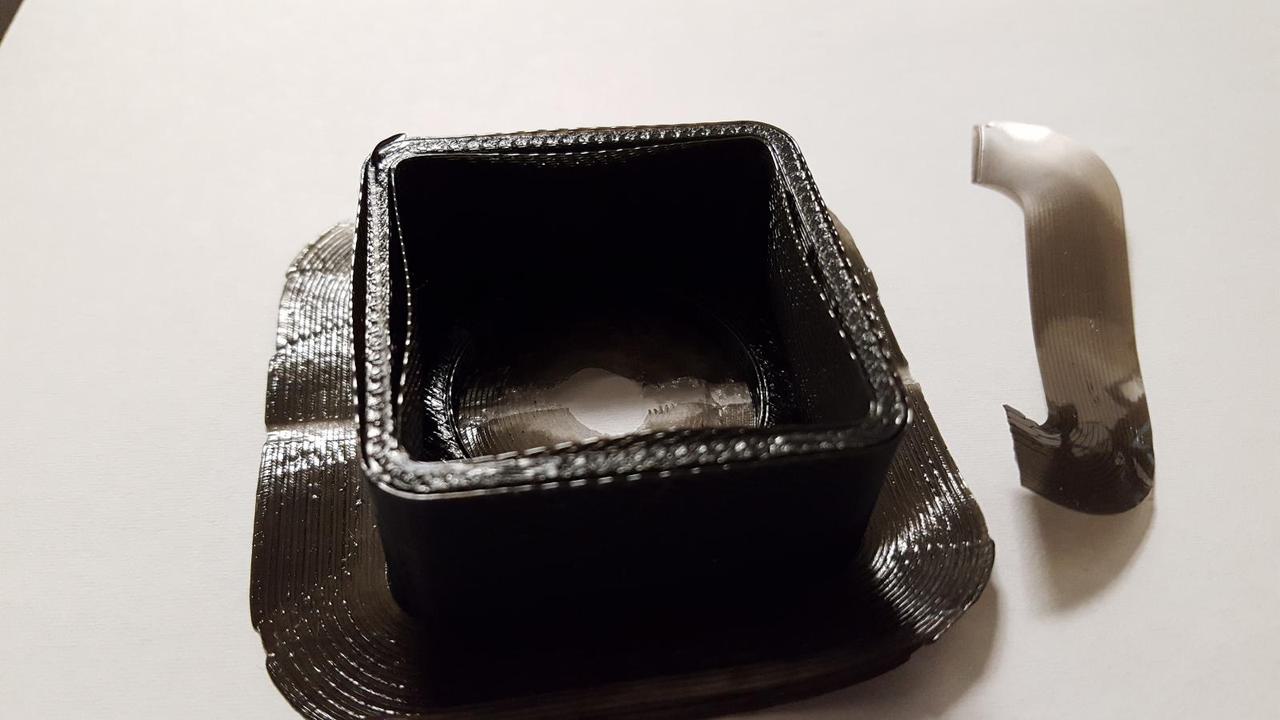
This time the print was completed successfully but unfortunately the two pieces didn't fit together like the version printed on the Ultimaker 2+ Extended printer. The lower resolution setting resulted in one piece that didn't fit into the negative space of the other.
I tried to save some time with lower resolution and a different printer but I ended up wasting much more time.
I did improve my design but I have more work to do. I am going to print it out again using a 0.4mm nozzle machine and higher resolution. Also, I see the value of test prints. I could have printed out only the critical sections of the pieces that are supposed to fit together to verify that they actually would fit together with the print settings I am using. I don't want to sit through a long print that isn't going to be usable. I'm also not going to make assumptions when I sit down to use a printer that the printer has been setup correctly with the right materials. I'm not giving up and I'll do better next time.
Tesseracts
I am particularly interested in 3D printed objects that have mathematical significance. Recently I received Henry Segerman's book, Visualizing Mathematics with 3D Printing. The book is an exploration of mathematical concepts using 3D printed objects. I would like to learn how to do this for my final project.
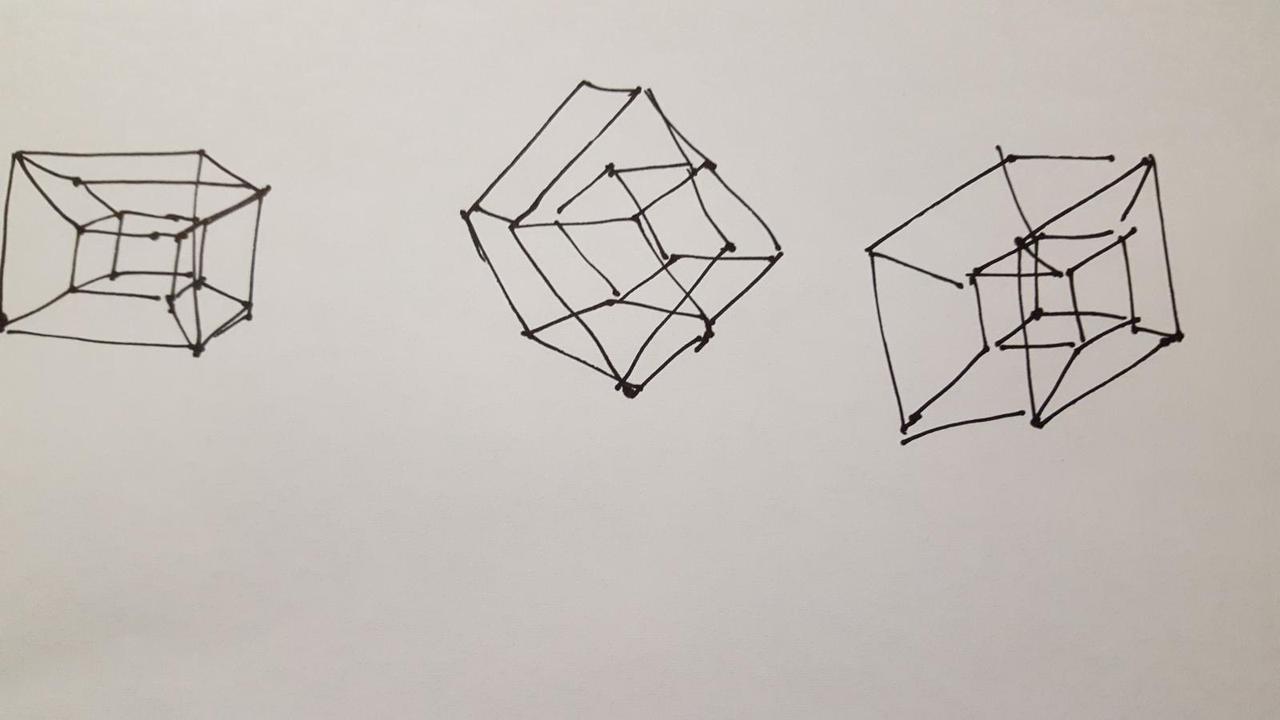
Few of these kinds of things can be easily modeled using the Rhino user interface so I will learn how to use the Python API to create my objects. I'll start with my favorite shape, the tesseract. A tesseract is a 4 dimensional cube. Of course a 3D printer is not capable of printing a 4 dimensional object, so we will settle for a projection of a tesseract into 3D space. This is essentially the shadow a tesseract would cast onto 3D space in the same way a cube casts a shadow onto a piece of paper. As the tesseract rotates in 4D space it will cast different shadows, appearing to us as a morphing shape but actually not changing at all.
I found a visualization of a rotating tesseract on Wikipedia to present the basic idea:

I will model and print multiple versions of a tesseract's shadow. I am going to use Python to calculate the locations of the tesseract's corners in 3D space and will use the Python API to create a model using spheres and cylinders for the vertices and edges. I am going to do this in a generic way so that I can use my code to do more than just tesseracts. Ideally, I will have a tool I can use to construct wireframe models for any geometric shape.
Below are some sketches of a tesseract's shadows. The sketches are terrible because it is almost impossible to sketch something like this on a piece of paper. But that's also the point of using a 3D printer: a 3D printed tesseract will do a much better job articulating what a tesseract actually is than a representation that is limited to 2 dimensions.
Comments